- Bloodborne Moonlight Greatsword Guide - September 8, 2022
Oh equipment! Where would we be without you?”
The world of Bloodborne is dark, dangerous and frankly, everything is out to kill you. There are a plethora of nasty foes that are hell-bent on making you drop all of those hard-earned runes and sending right back to the Hunter’s Dream. So the last thing you want to be doing is wandering around the dimly-lit streets of Yharnam without anything to defend yourself. Luckily for you, I’m here to give you a quick run-down on how to properly defend yourself against everything Bloodborne has to offer.
To make things easier to digest, I’ve split all the equipment into five main categories:
- Attire
- Caryll Runes (And Oaths)
- Items
- Blood Gems & Ritual Materials
To access your equipment menu, simply hit the Options button on your controller.
Weapons
Now as you might have already guessed, this is going to be your bread and butter during your stay in Yharnam and is probably the first thing you want to try and get your hands on. Weapons in Bloodborne are always equipped onto your character’s right hand but if the fancy takes you, two-handing your weapon is also a possibility.
The various choice of weaponry allows them to fit any type of playstyle or character build you are planning on going with and if you feel like switching to a different armament later on; it’s as easy as a push of a button. Simply put, you are not bound or limited to one singular weapon and can change on the fly, regarding you have the Blood Echoes and materials to upgrade them.
Weapons vary in shape, size, attack speed, and special abilities so it doesn’t matter what type of weapon you prefer, Bloodborne has it! Want to use a big, heavy, and obliterate your enemies’ health bar with a single swing? Then you’d probably like the Kirkhammer or Ludwig’s Holy Sword? If you prefer being light on your feet and running circles around your opponents, then perhaps the Blade of Mercy or the Saw Cleaver is more your speed? Also, as an added bonus, almost every melee weapon has the ability to change into an alternate form using a powerful ‘Transforming attack’. This gives your weapon a lot of utility in different enemy encounters. For instance, if you’re wielding the mighty Kirkhammer, you can use a transforming attack to turn it into a straight sword for faster, lighter attacks that are easier on your stamina bar and then back into a huge hammer to do some serious damage.
Serration & Righteous

A certain selection of weapons also deal two types of damage: Serration and Righteous. Serration damage deals roughly 20% more damage to beast-like enemies, like the Cleric Beast or Father Gascoigne. This could really give you an edge in a battle with a beast so it might be worth picking up a serrated weapon, like the Threaded Cane or the Church Pick. Righteous weapon damage is quite different from serrated damage. It deals additional damage to ‘enemies of the ‘Healing Church’.
To put it briefly, the Healing Church is a faction within Bloodborne, lead by Laurence who was the man that discovered the ‘Old Blood’ in the sprawling ancient labyrinth underneath the gothic city of Yharnam.
Unlike the serrated damage, righteous damage ranges in the damage it deals depending on what weapon you’re using; with 20% being the minimum and 50% being the maximum. Enemies of the Healing Church include foes like that reside in the Castle of Cainhurst, such as the monstrous Bloodlickers and the nightmare fuel that is the Lost Child of Antiquity.
Sidearms

Sidearms are guns that specialize in picking off enemies from a distance and are excellent at providing an opening for you to parry a foe’s incoming attack. These ranged weapons sit in the opposite hand to your weapon but unfortunately, they cannot be wielded with both hands, like their right-hand counterparts. They deal a unique type of damage to enemies that the majority of melee weapons cannot: Blood Damage. But like the melee weapons, the sidearms also differ with their design, damage and attack. A good example is the Flamesprayer, which is essentially a flamethrower; so its start-up time and rate of fire is vastly different compared to the other sidearms that fire bullets.
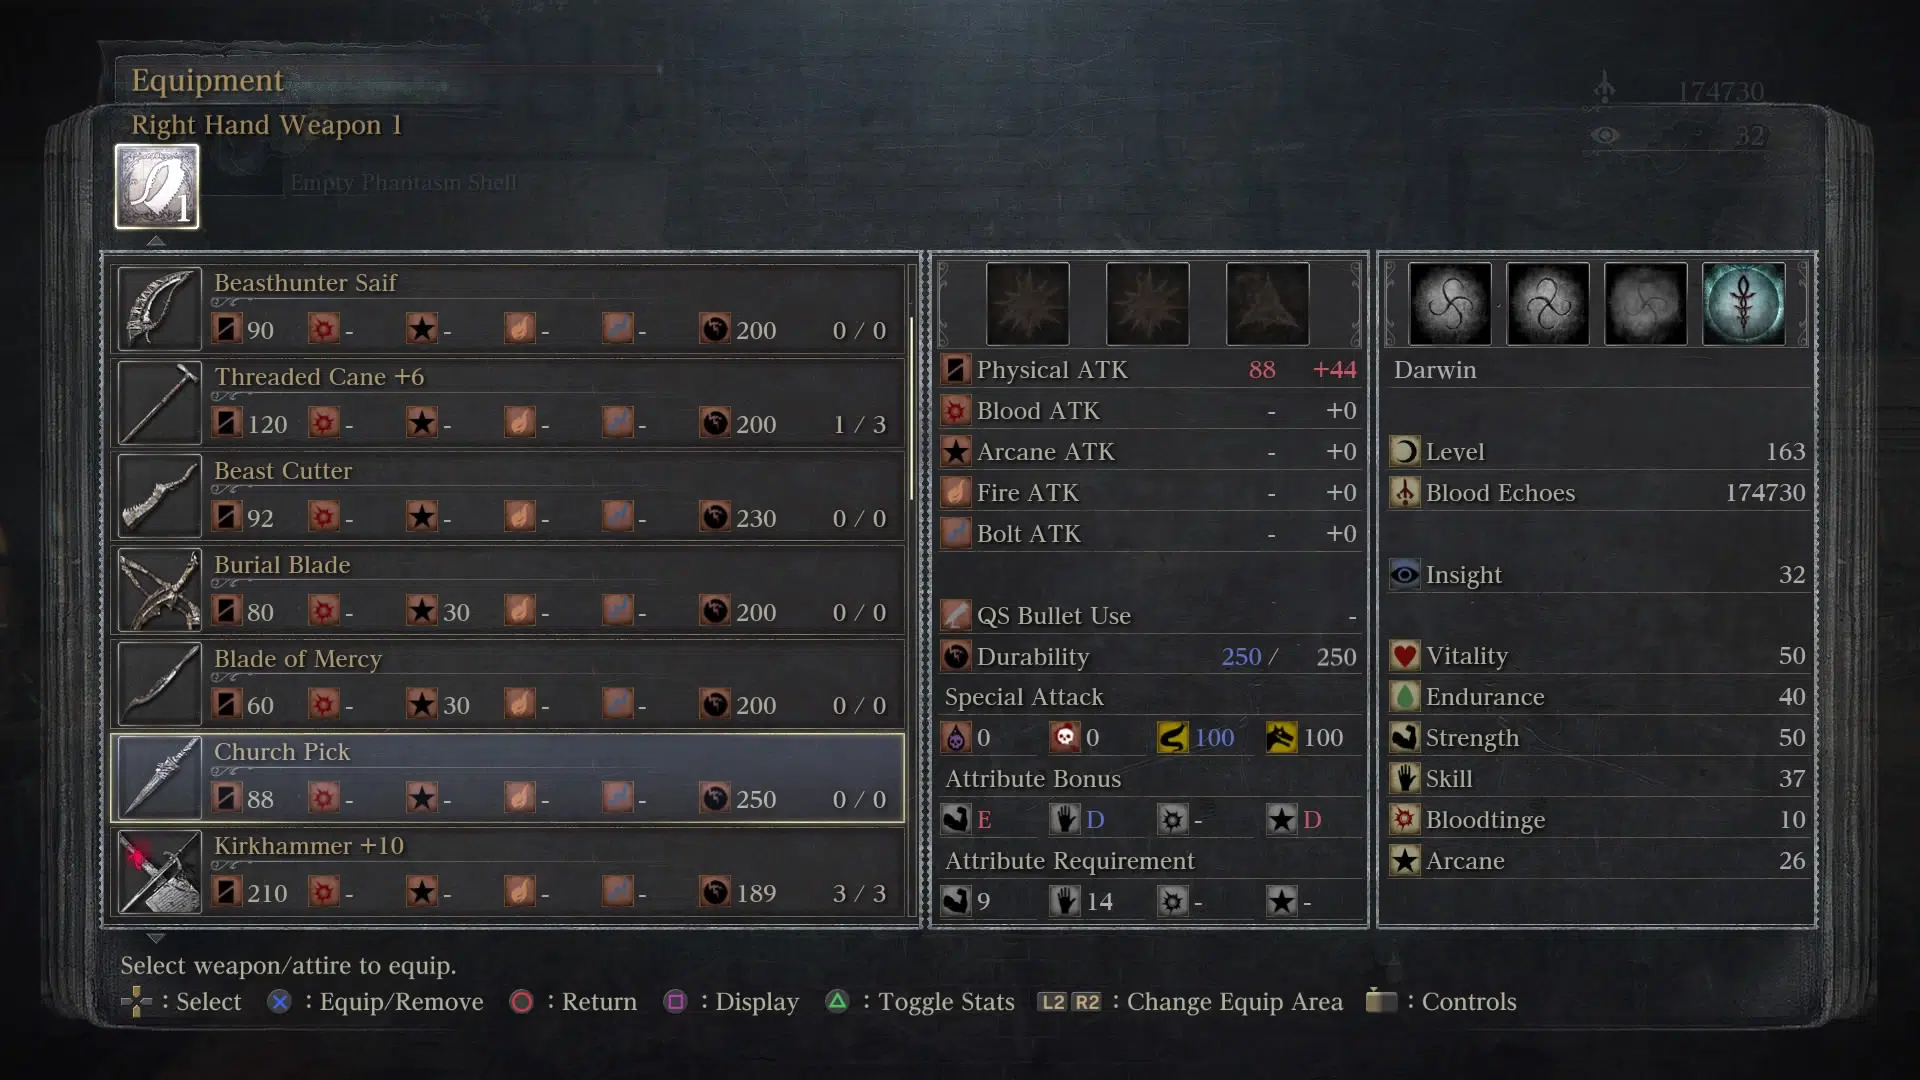
Stats & Scaling
But that’s not all. Stat requirements are another crucial part of picking the right weapon. You’ll find that the three starter weapons you are handed at the beginning of the game don’t require any specific parameters for you to use them but that will quickly change the further you delve into the world of Bloodborne. Weapons revolve around these four attributes:
- Skill:- Governs the use of more dexterous weapons and increases the damage of visceral attacks.
- Strength:- Governs the damage of heavy, physical weapons. Also increases the damage of visceral attacks.
- Arcane:- Governs the power of Arcane-based attacks, it also increase the chance that you’ll find items after defeating enemies.
- Bloodtinge:- Governs the power of Blood damage-based attacks, such as firearms.
Weapon scaling is also another important feature in Bloodborne and is a staple in most of Fromsoftware’s games. Scaling is a term used to describe how much additional damage a weapon deals depending on the stat it is the most compatible with and as well as what level of upgrade the weapon is at. They rank in terms of letters with ‘E’ being the lowest and ‘S’ being the highest. At +1, weapons scale around E to D in most stats but at +10 the majority of weapons have at least on stat they scale the best with.
Weapon Controls
Well, it’s all good and well being informed about the weapons in Bloodborne, but how do you go about actually using them? Good question. Weapon attacks are mapped to four buttons: R1, R2, L1, and L2.
One-handed
- R1:- Regular attack
- R2:- Strong attack, changes to Charge attack when the button is held down long enough
- R2+ Left stick forward:- Jump attack
- R1+L1:- Transforming attack
- L2:- Shoots the Firearm
Two-handed
- R1:- Regular attack
- R2:- Strong attack, changes to Charge attack when the button is held down long enough
- R2+ Left stick forward:- Jump attack
- L2:- Special attack
Attire
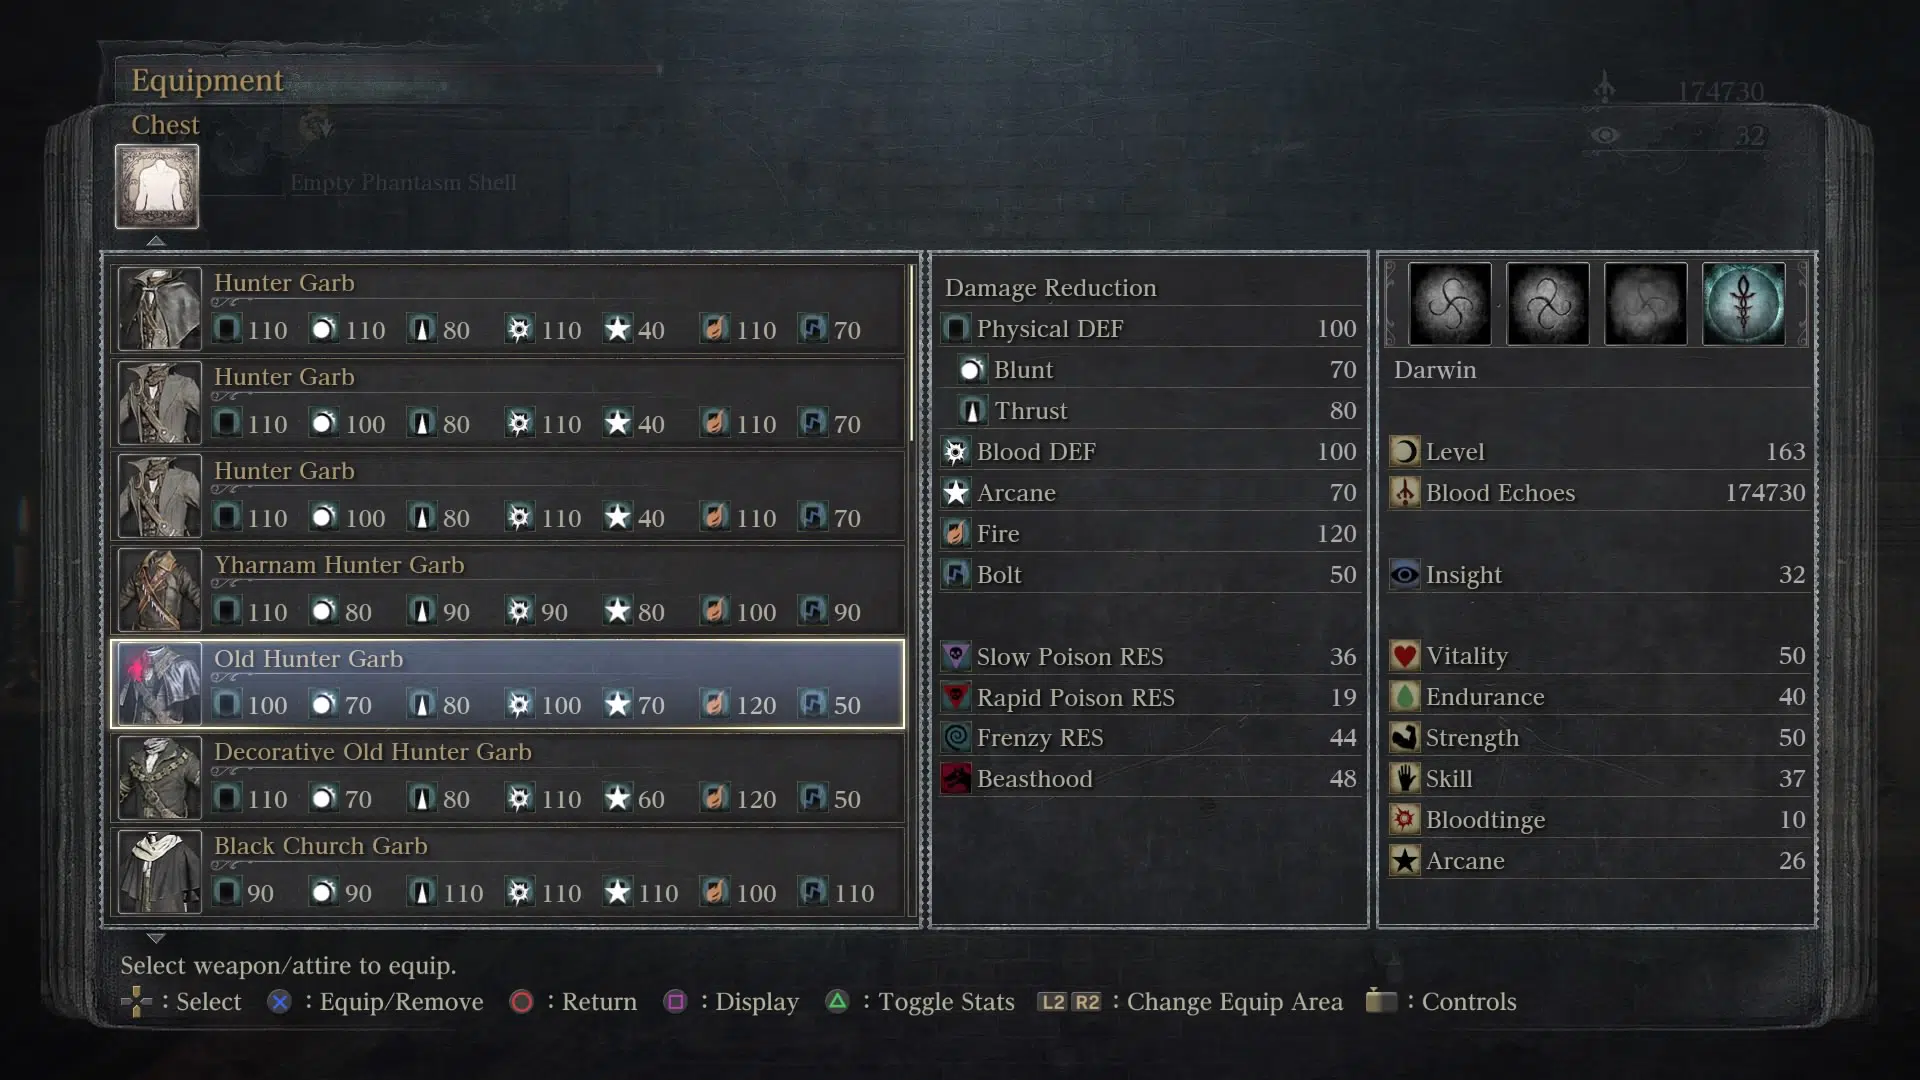
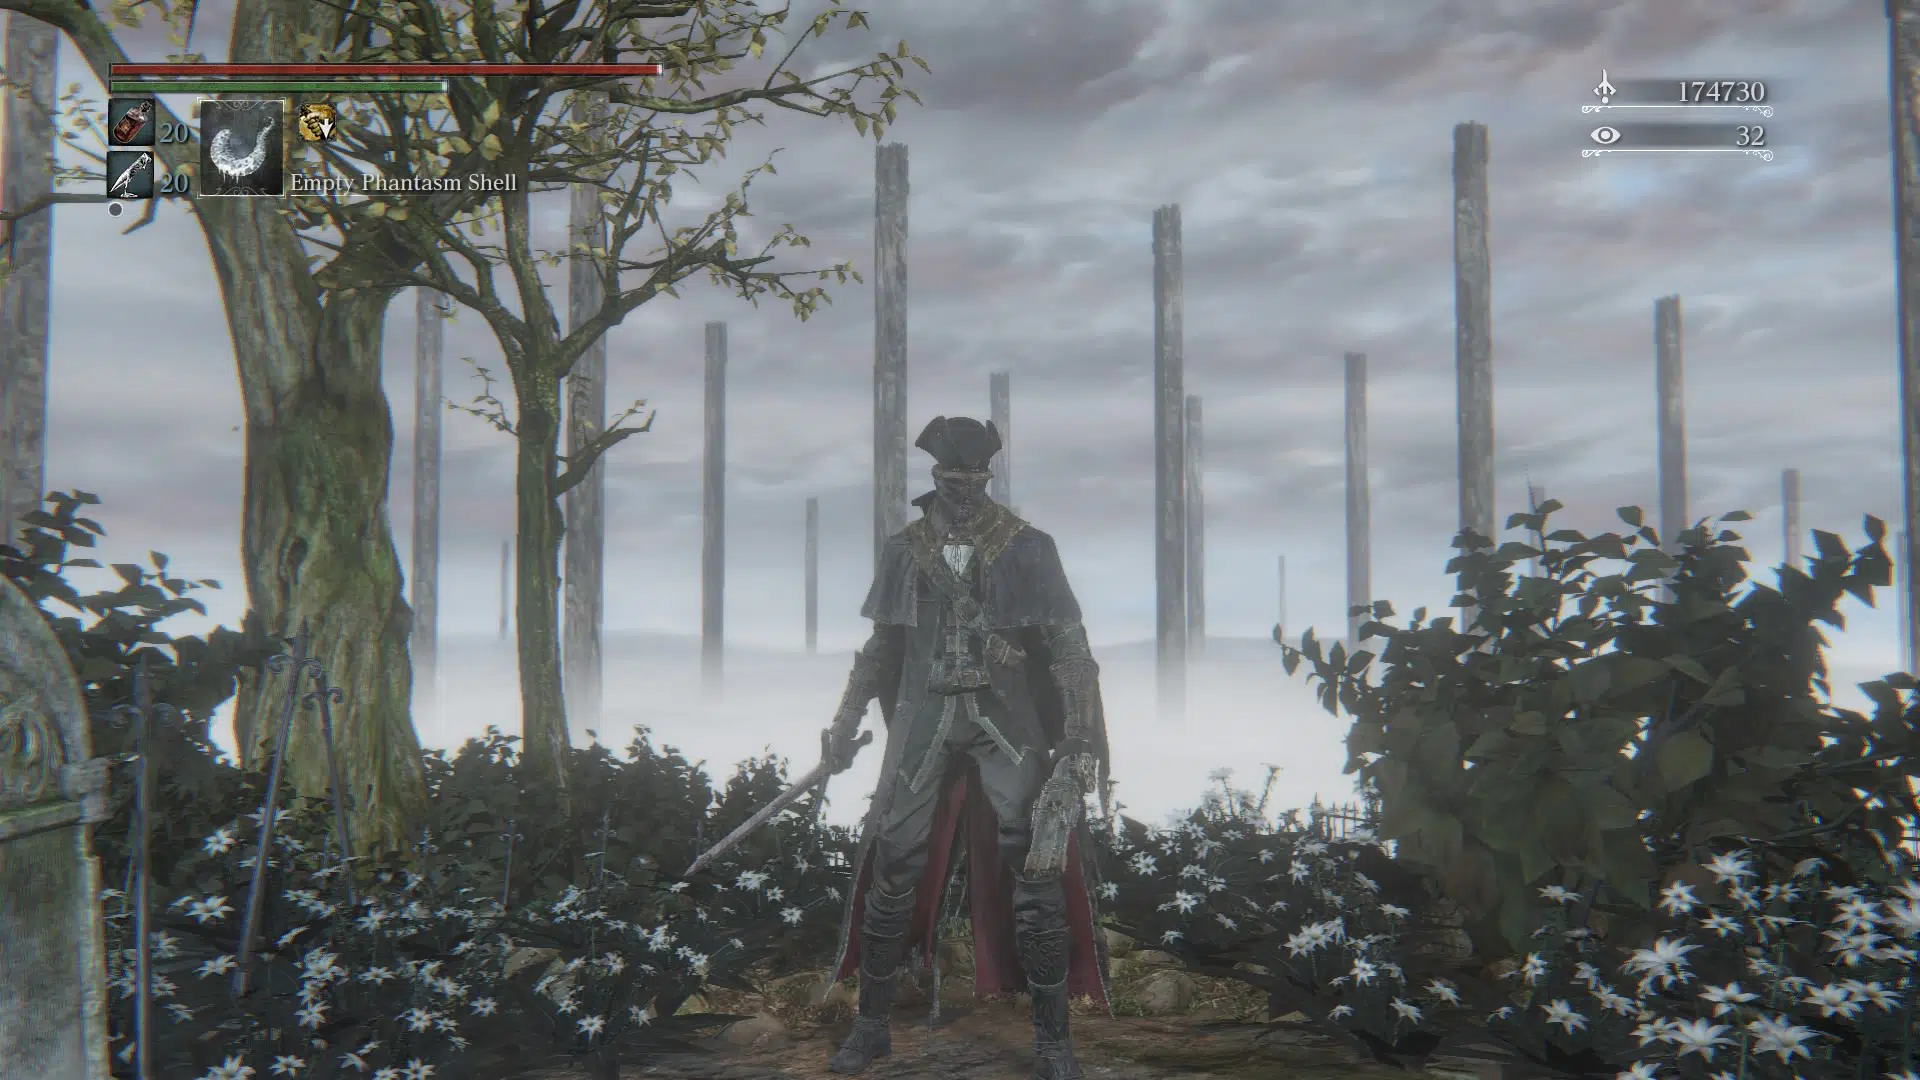
Now if Bloodborne is known for anything other than its gameplay, it would be its unique sense of style. The Victorian-era fantasy style-buildings and grim, dark atmosphere of the world has made the game iconic and easy to recognize at a first glance. Of course, this is not just limited to the architecture and environments; the numerous amount of wearable equipment found within the world of Bloodborne are not only a serious fashion statement but they offer a level of protection that is bound to help in your journey through Yharnam.
Most attire drops in sets, allowing you to get uniform, induvial pieces for the head, torso, legs, and feet. They all offer a level of defense against ten types of damage:
- Physical DEF:- Defends against any and all physical attacks
- Strike DEF:- Defends against any strike damage from weapons, like hammers or fists.
- Thrust DEF:- Defends against thrust damage from weapons, like spears or swords
- Blood DEF:- Defends against blood damage from firearms
- Arcane DEF:- Defends against damage from arcane-based attacks
- Fire DEF:- Defends against damage from fire-based attacks
- Bolt DEF:- Defends against damage from lightning-based attacks
- Slow poison DEF:- Increases the player’s resistance to slow poison
- Rapid poison DEF:- Increases the player’s resistance to rapidly accumulating poison
- Frenzy DEF:- Increases the player’s resistance to the Frenzy status
Although there is plenty of different attire to choose from you will quickly realize that, when you eventually reach higher Blood Echo levels and later areas in Bloodborne, attire doesn’t really offer all a whole lot of defense against enemy attacks. This is because Bloodborne encourages you to use an aggressive playstyle when taking down opponents using a unique mechanic called Rally. Ever heard the saying: ‘The best defense is a good offense?’ Rally rewards a player’s more beast-like side by allowing them to regain any lost HP by continually attacking opponents, so it balances this out with mediocre armor stats.
Saying that, some pieces of attire are very good at building up your immunity to various status effects, like. Also, be aware that, unlike weapons, attire does not scale up with any of your attributes.
You can find many different attire sets just laying around, waiting to be picked up; but there are some that are only obtainable by beating a boss, such as Father Gascoigne, or completing a specific character’s questline, like Eileen the Crow.
Oh, what’s my favorite attire set, you ask? A pretty difficult question but I’d have to go with a mix of a few. The Hunter’s Mask, the Old Hunter Garb, the Hunter Trousers, and Hunter Boots. I like the Old Hunter Garb specifically because it’s sort of like a fancier version of the usual Hunter Set but with more lore-accurate details.
Runes
Now listen up, because these are important! Runes fall into two categories: Caryll Runes and Oaths Runes. These will be indispensable in your journey through the world of Bloodborne as they can net you some pretty solid benefits, both in offline and online play. But we’ll get to that, don’t worry.
Caryll Runes
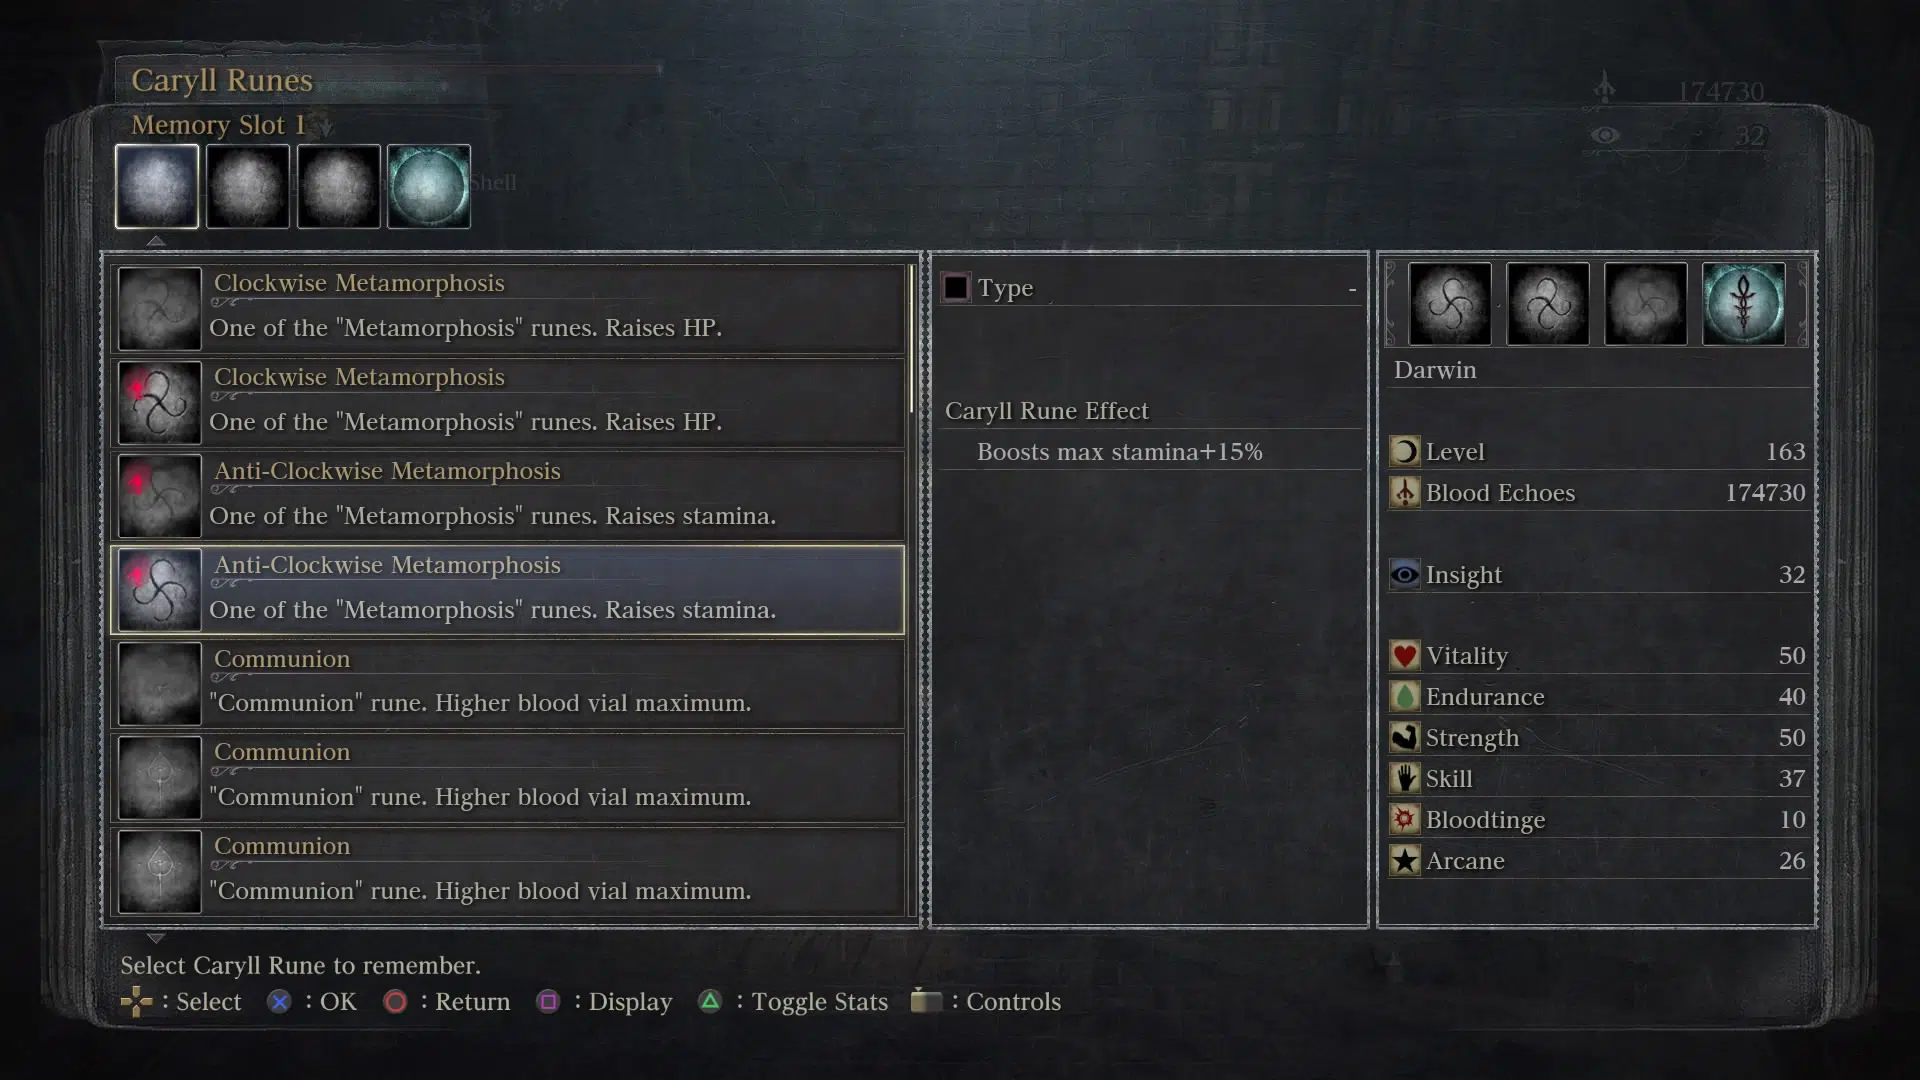
Within the lore of Bloodborne, Caryll Runes are words or phrases that were uttered by the eldritch beings called the Great Ones. A person called Runesmith Caryll had a talent to understand and decipher these words into runes that the human mind could comprehend. When memorized by a human, these runes are capable of granting them an incredible level of power.
You can equip up to three Caryll Runes at any given time, but be advised that you can’t use two if they are in the same tier. So for example, you’d be unable to use Moon +1 and Moon +1 but Moon +1 and Moon +2 would work just fine. You can equip Caryll Runes at the Memory Altar in the Hunter’s Dream, after you’ve picked up the Rune Workshop Tool (More on that later).
Now there are a ton of Caryll Runes, all with different tiers so I’ll only list a few of the most useful and easily accessible ones here and where to find them:
- Eye +2:- Increases item discovery (Dropped by Master Wilhem )
- Moon +3:- Increases Blood Echoes from fallen foes. (Dropped by the Brain of Mensis)
- Heir +3:- Increases amount of Blood Echoes after landing a parry (Found in the Pthumeru Ihyll Root Chalice)
- Communion +4:- Increases the amount of Blood Vials you can carry (Dropped by the boss, the Celestial Emissary)
- Formless Odeon +3:- Increases the amount of Quicksilver Bullets you can carry (Found on top of the Odeon Chapel)
- Clockwise Metamorphosis +3:- Increases max HP (Found in the Nightmare Frontier)
- Anti-Clockwise Metamorphosis +3:- Increases max stamina (Found in the Lecture Building)
- Guidance +3:- Boosts the effects of Rally (Dropped by Ludwig the Accursed)
Oath Runes
As I mentioned earlier Oath Runes are based around the various covenants that make up the world of Bloodborne: each with their own ideals and schools of thought. Covenants are a staple in Fromsoftware games and the way they work are similar to other titles, such as Dark Souls.
There’s four different covenants to choose from in Bloodborne but don’t worry I’ll give you some more info on where to find each one.
Cainhurst Vilebloods

Allows the hunter to invade hosts and collect Blood Dregs from defeating opponents in combat, these can be turned in for rewards and rank level-ups. There’s two ranks for you to climb and two rewards to accompany them. Upon joining the covenant, you’ll be given the ‘Respect’ gesture. After offering one Blood Dreg to Queen Annalise, you’ll obtain the ‘Deep Respect’ gesture.
Executioners

If they are summoned while a Vileblood is around it will result in a death match between the two regardless, even if the Executioner had been summoned for co-operation.
The League

Allows the hunter to collect Vermin from killing bosses via co-op play. ‘Crushing’ these Vermin allows the hunter to earn rewards and level up their covenant rank. There’s three ranks for this covenants
Hunter of Hunters
?file=Hunter_%2528Item%2529.jpg)
Allows the hunter to be summoned as a purple adversary, multiple purple adversaries will be non-hostile to one another but they’ll still be able to attack other invaders.
Items
You won’t be getting very far without these. Arguably, items are the most important objects in Bloodborne; they’re able to give you the upper hand in and out of combat which can allow you to defeat your enemies in rather unique and clever ways.
You can find items just about everywhere in Bloodborne but they can also be purchased from the Bath Messengers and the Insight Messengers in the Hunter’s Dream, although they can get a tad expensive. A wider selection of items will be available depending on how many hunter badges you have collected. There’s 12 in total (including the Firing Hammer Badge that’s found in the Old Hunter’s DLC) and they can be found within the world or from defeating bosses.
I’ll list a few that grant access to some of the most useful items:
- Cosmic Eye Watcher Badge (Found in Upper Cathedral Ward)
- Radiant Hunter Badge (Found in the Healing Church Workshop)
- Powder Keg Hunter Badge (Acquired from either killing Djura or befriending him)
- Spark Hunter Badge (Obtained from killing Darkbeast Paarl)
- Sword Hunter Badge (Obtained from killing the Cleric Beast)
- Saw Hunter Badge (Found in Central Yharnam)
You can also pay a visit to the nightmarish Patches the Spider to take care of your items needs but do that at your own peril…
There’s an absolute ton of items I could list but to keep things easier, I will mention the ones that are useful in most situations:
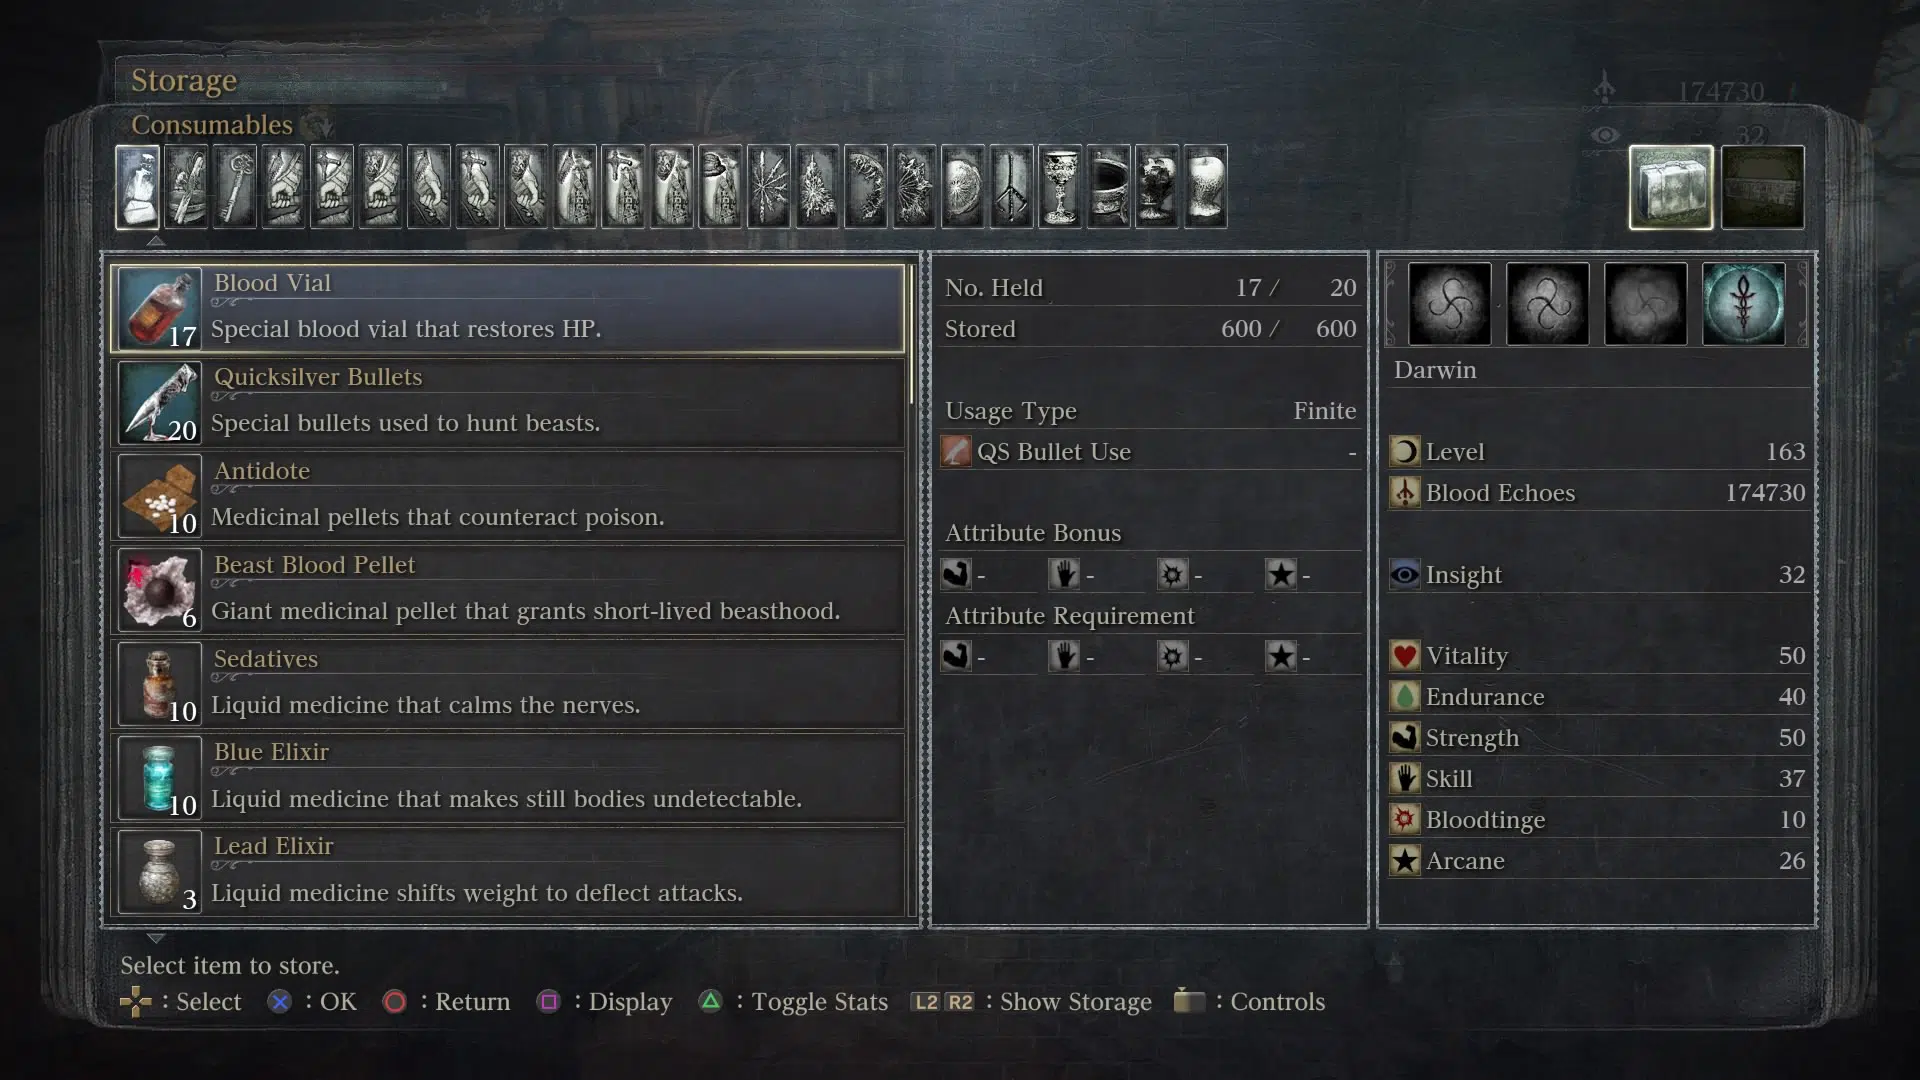
Recovery Items

- Blood Vials:- Heal the hunter’s HP. (Found in most locations and dropped by most enemies)
- Antidote:- Cures poison build-up (Sold by the Bath Messengers, Chalice Messengers, and Patches the Spider)
- Sedatives:- Reduce the player’s Frenzy build-up (Sold by the Bath Messengers and Patches the Spider)
- Beast Blood Pellet:- Increases the player’s attack for one minute, also lowers their defenses. With each attack, the player builds-up the beast blood gauge and increases their attack power. (Sold by the Insight Bath Messengers)
Offensive Items

- Bolt Paper:- Imbues the hunter’s weapon with lightning, causing additional lightning damage with each hit. (Sold by the Bath Messengers, Insight Messengers, and Patches the Spider)
- Fire Paper:- Imbues the hunter’s weapon with fire, causing additional fire damage with each hit. (Sold by the Bath Messengers, Insight Messengers, and Patches the Spider)
- Molotov Cocktail:- When tossed at the target, it explodes on contact causing fire damage to everything in the immediate area. (Sold by the Bath Messengers, Insight Messengers and Patches the Spider)
- Oil Urn:- Projectile. Covers the target in oil, making them take double the damage from the next fire-based attack. (Sold by the Bath Messengers, Insight Messengers, and Patches the Spider)
- Poison Throwing Knives:- Causes poison build-up when thrown. Must throw multiple at the target to cause the poison effect. Also note that different enemies have different tolerances to poison. (Sold by the Bath Messengers, Insight Messengers, and Patches the Spider)
Miscellaneous Items

- Monocular:- Allows the hunter to observe faraway objects and enemies. (Found in Cathedral Ward)
- Bold Hunter’s Mark:- Allows the hunter to return to the last Lamp they rested at, without using any Blood Echoes. (Sold by the Bath Messengers, Insight Messengers, and Patches the Spider)
- Hand Lantern:- Allows the hunter to illuminate the immediate area around them when in dark environments. (Sold by the Bath Messengers)
- Pungent Blood Cocktail:- When thrown, it breaks on impact, this attracts beast-like enemies causing them to totally ignore you for a few seconds. (Sold by the Bath Messengers, Insight Messengers, and Patches the Spider)
- Blue Elixir:- Allows the user to turn transparent for 30 seconds, making it harder for enemies to spot you. (Sold by Insight Bath Messengers)
- Coldbloods:- Grant Blood Echoes when used. The smallest amount comes from Coldblood Dews which is 350 and the most comes from Revered Great One Coldblood which is 1000000. (Found in most locations)
Arcane/Bloodtinge Items

- Old Hunter’s Bone:- Allows the hunter to use the act of Quickening, enhancing the hunter’s dodges. (Found in the Abandoned Old Workshop)
- Empty Phantasm Shell:- Imbues the hunter’s weapon with arcane power. (Found in a chest in Byrgenwerth)
- Tiny Tonitrus:-Fires of a line of lightning, causing bolt damage. (Found in Yahar’gul, the Unseen Village)
- Executioner’s Gloves:- Fires three floating arcane skulls towards the target. (Found within Cainhurst Castle)
Key Items

- Rune Workshop Tool:- Allows the hunter to equip all kind of runes. (Found at Hemwick Charnel Lane, after the Witch of Hemwick boss fight)
- Cainhurst Summons:- Grants the hunter access to Cainhurst Castle. (Obtained in Iosefka’s Clinic after sneaking back in through the Forbidden Woods)
- Blood Gem Workshop Tool:- Allows the hunter to attach various Blood Gems to their weapons. (Found in Central Yharnam)
- Short Ritual Root Chalice:- Allows you to access online play when using the Chalice Dungeons. (As of Patch v.104, you can buy this from the Insight Bath Messengers)
Multiplayer Items

- Beckoning Bell:- Allows the hunter to spend 1 Insight to try and summon allies into your world. (Gifted by the Messengers)
- Silencing Blank:- Cancels all multiplayer activities. (Given by the Insight Bath Messengers)
- Small Resonant Bell:- Allows you to join another hunter’s world as a guest, helping them beat bosses and invaders. (Sold by the Insight Bath Messengers)
- Notebook:- Allows the hunter to leave messages around the world. (Gifted by the messengers when you first visit the Hunter’s Dream)
Blood Gems & Ritual Materials
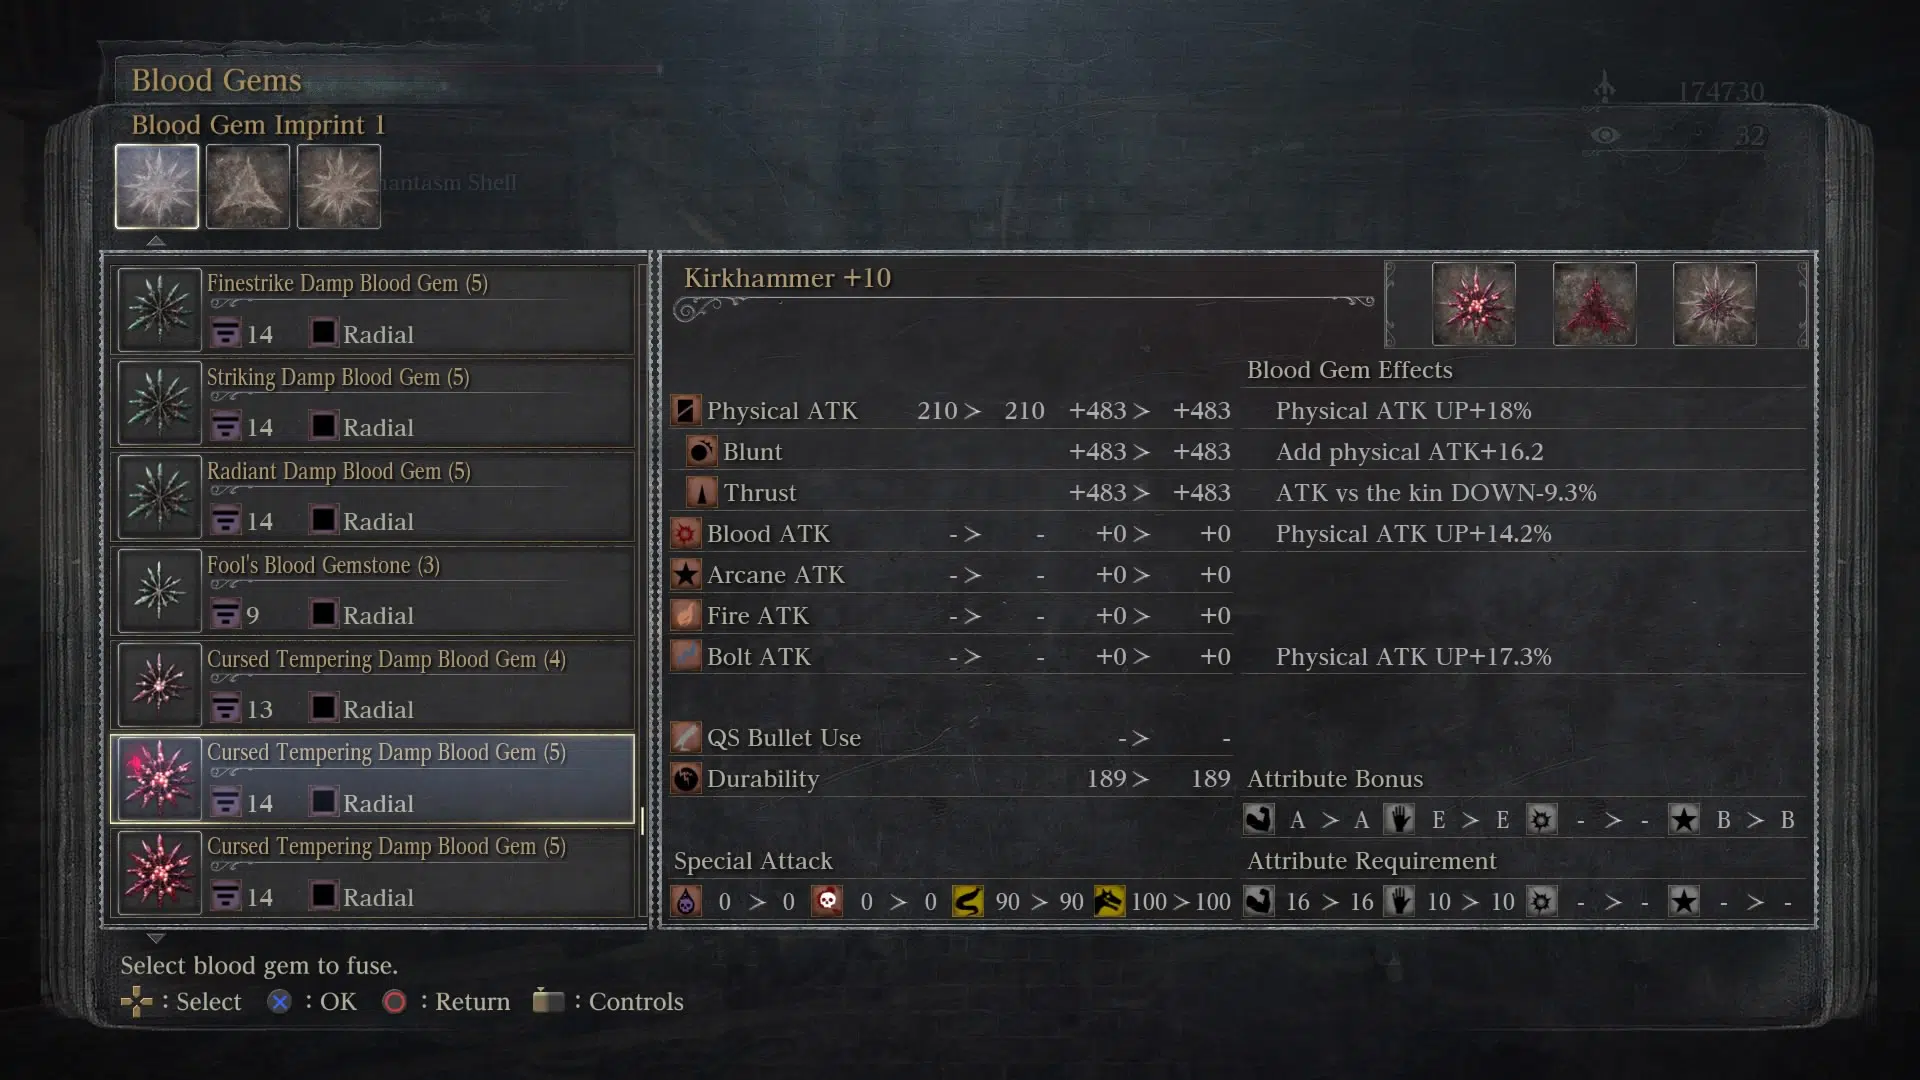
Blood Gems are a boon and can give you that edge you need to defeat a particularly difficult foe. Now unlike every other kind of item in Bloodborne, Blood Gems are very rare to naturally obtain outside of the Chalice Dungeons; so prepare yourself for a descent into the depths. A common trait with Blood Gems is that they usually have both a primary effect and a secondary effect.
Here’s some of the positive effects that they have:
- Additional Physical Damage
- Additional Fire Damage
- Additional Bolt Damage
- Additional Arcane Damage
- Additional Slow Poison Damage
- Additional Rapid Poison Damage
Blood Gems came in three different shapes depending on what type of Root Chalice you decide to use, these shapes also correspond to what sort of effects the Blood Gems will have:
- Loran:- Waning (Mostly elemental effects)
- Isz:-Triangular (Physical and most elemental effects)
- Pthumeru:- Radial (Mostly Physical effects)
Upon your travel deeper and deeper into the Chalice Dungeons, you may come across Cursed Blood Gems. As the name implies, these gems have a negative effect attached to them and are only obtained from farming Winter Lanterns or using Cursed Chalices. These Blood Gems usually have a very positive effect to try and balance out the negative one, but where it’s worth using, well that one’s up to you…
Here or some of the Cursed Blood Gem effects to give you an idea:
- HP Drain:- Very slowly drains the hunter’s HP.
- Attack Down:- Lowers the weapon’s attack power.
- Increased Stamina Costs:- Increases the amount of stamina it takes to sprint, attack, and dodge.
- Attack Vs Beasts Down:- Lowers the weapon’s attack power against Beasts.
- Attack Vs Kin Down:- Lowers the weapon’s attack power against the Kin.
- Durability Down:- Increases the speed at which your weapon loses durability, a broken weapon will deal almost no damage.
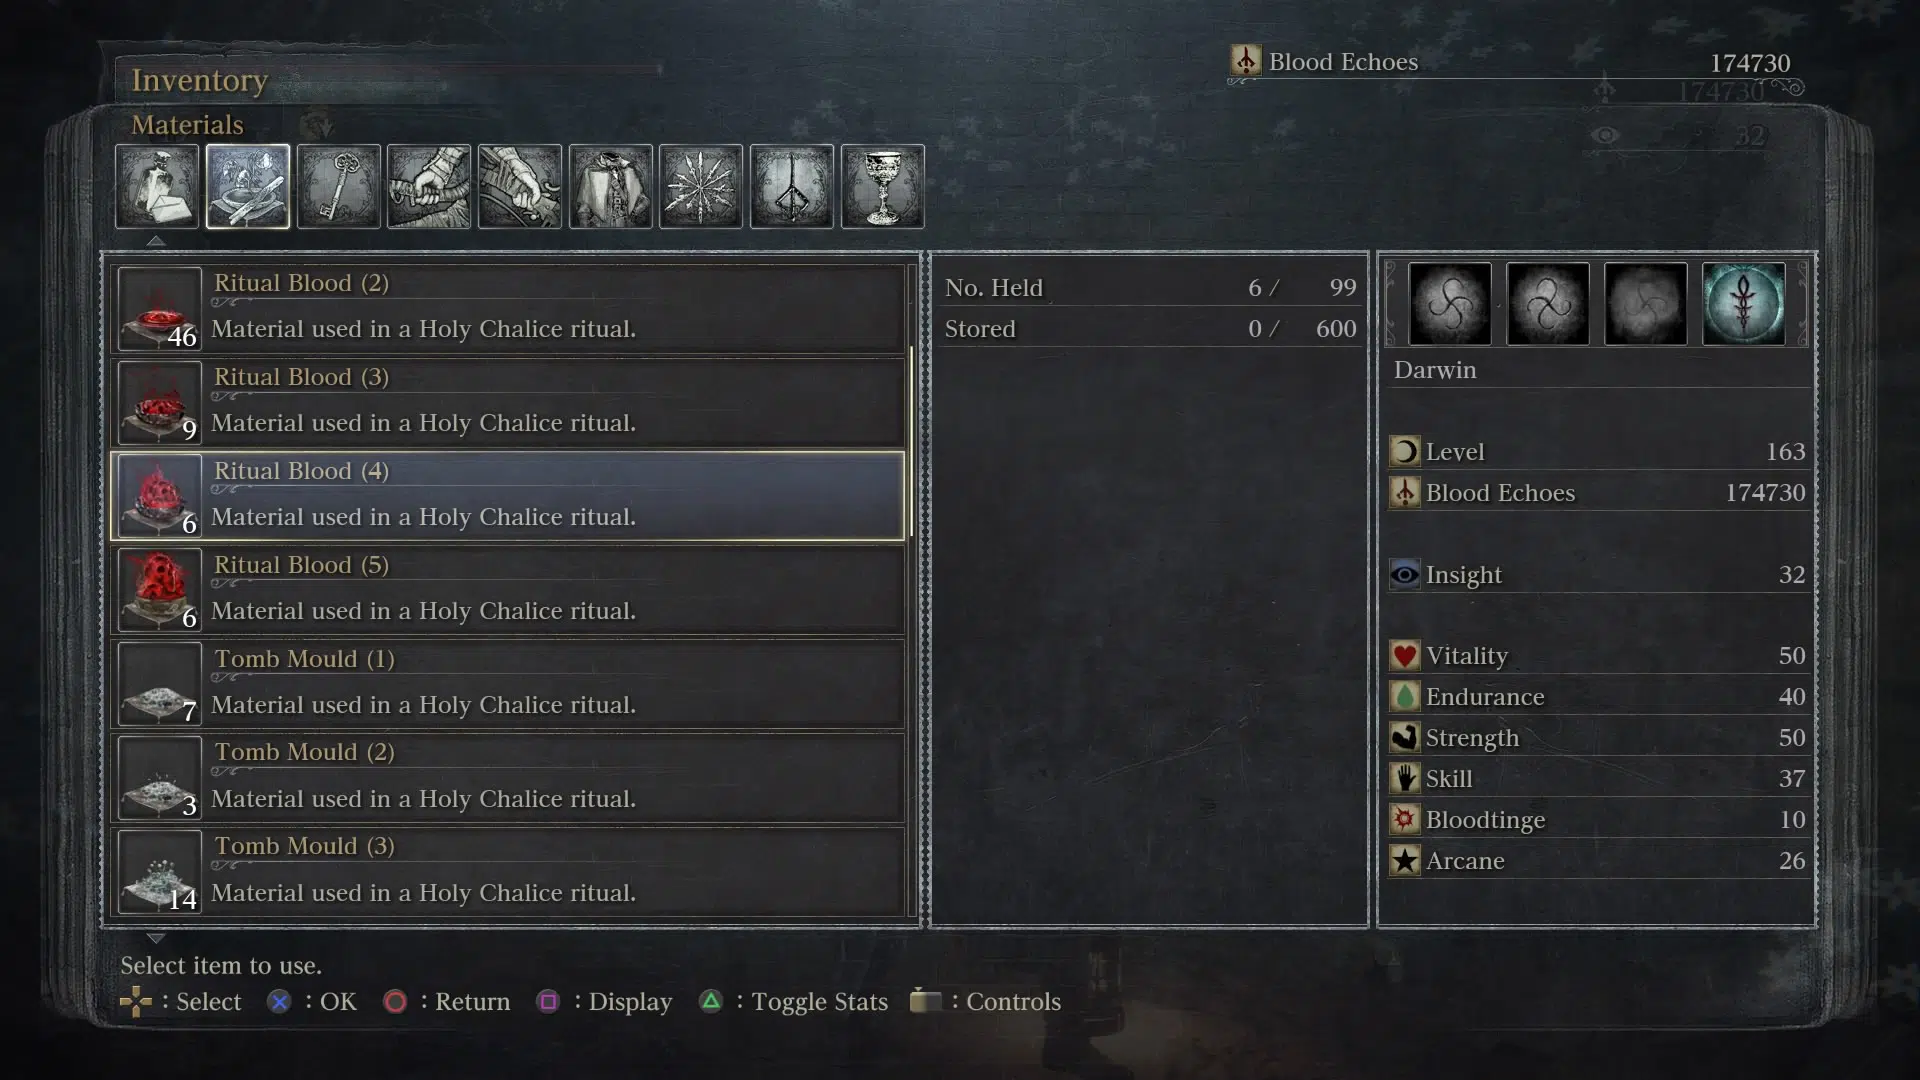
Ritual Materials and Blood Gems can seem a bit daunting at first but after you realize how they work, you’ll find them pretty straightforward. Both of these items are tied very closely to the Chalice Dungeons, which are a maze of mysterious underground caverns and tunnels that contain terrifyingly strong enemies and wondrous rewards. To access them you need a Root Chalice and at least one kind of Blood Ritual Material.
Ritual Materials are able to grant access to different levels of the Chalice Dungeons based on the number next to their names. For example, Tomb Mold (1) lets the hunter explore the 1st level of that particular Chalice Dungeon whilst Tomb Mold (3) would grant access to the lowest depths. You can grab some Ritual Materials in different locations and from both of the Bath Messengers.
FAQs
Equipment in Bloodborne is Your Best Friend
It really is. From the weapons to the attire to the items, equipment in this game offers a fun and dynamic way to experience Bloodborne that allows more than enough room for player customization. Whether you want to adopt a quick and stealthy playstyle by using Blue Elixirs and the Old Hunter’s Bone or go in all guns ablazing using the Gatling Gun and the Firing Hammer, either way, is more than doable and a viable way to play the game.
For the more seasoned hunter, optimizing stats, gear, and Blood Gems are a completely different rabbit hole to get pulled into. Not only that but you get to look cool and stylish whilst you do it too!
No matter what kind of dire situation you find yourself in, there’s most likely an item, weapon, or piece of attire that can get you out of it!
Well, I think with all of this information you’ll do just fine in Yharnam! Choose your weapons and attire properly and remember to stock up on items as well! Don’t forget about using those Blood Gems either! Be resourceful but at the same time don’t be afraid to use what you have to to survive!
Oh, one more thing: Beware of the beast’s blood, the last thing I want is for you to do is to become consumed by it…
Continue reading:
Bloodborne Soft Caps Explained
Father Gascoigne Guide: Where to Find & How to Defeat This Boss