- Bloodborne Moon Presence Guide - October 28, 2022
- Bloodborne Hunter’s Mark Guide - September 20, 2022
- Bloodborne Runes Guide - September 8, 2022
Yharnam is littered with interesting characters with in-depth quest lines. These Characters work to give the game life, and the side content from these NPCs can help deepen and extend playtimes for hours. Below, I will go over the main characters in Bloodborne, and all there is to know about their quest lines. Be warned, however, that there are major NPC spoilers ahead.
Blood Minister
- Location: 1st Floor Sickroom
- Items: None
- Quest: No
The Blood Minister makes a very brief appearance in Bloodborne; however, he certainly will profoundly impact players. We meet him in the opening cutscene to the game, as he is the person giving us our blood transfusion. He appears in a wheelchair, welcoming us to Yharnam, calling it the ‘Home of Blood Ministration,’ and beckons us to uncover the secrets within this city.
Although we do not know who these Blood Ministers genuinely serve, we do know that there are many around Yharnam, and this one Blood Minister happened to look over our transfusion. He offers us a contract, which will prompt the character creation screen. After this, the contract is sealed, and he will begin to laugh as our screen cuts to black.
Young Girl and Older Sister
- Location: Central Yharnam
- Items: Music Box
- Quest: Yes
The Young Girl and the Older Sister are the daughters of Father Gascoigne, and talking with them reveals that he has abandoned them. Gascoigne ran off to hunt the beasts, and the blood lust overcame him, causing him to leave his family and hunt everyone.
The sisters will ask you to look for their mother, Viola, because she went to look for the father. Grabbing the Red Jeweled Brooch after the boss battle and giving it to the girls will make them know their mother’s fate.
After killing Rom and returning to the window, the oldest sister will ask you to find her little sister, as she left to find her mother. After reloading the area and heading down the ladder directly behind the home will show the White Messenger Ribbon of the little girl, showing that she sadly didn’t make it far in her search.
Gilbert

- Location: Central Yharnam Lantern
- Items: Flamespryer, Clawmark Rune
- Quest: Yes
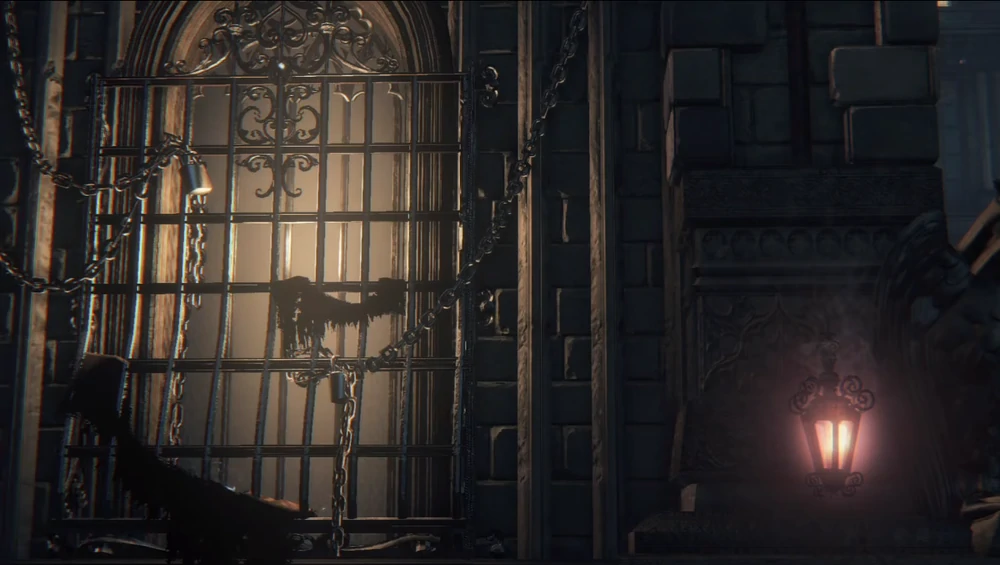
Gilbert is one of the few citizens in Yharnam that has not turned into a beast yet. He hides in his home, sick and waiting for his transition to occur, and suddenly we come into town, begging for answers from him. At the start of the game, he can be found at the Central Yharnam lamp. When the Hunter loads in, look at the left side of the building, illuminated with a red lantern.
This is Gilbert’s home, and by coming to the left side window, we can have a conversation with him. Ensure to exhaust his dialogue when approaching the window, as here he gives the Hunter valuable information about the Healing Church, blood, and much more. If you return to Gilbert after defeating Father Gascoigne, he will reward you with the Flamesprayer, a flamethrower-like weapon that spits fire at the cost of Quicksilver bullets.
As the game progresses and Gilbert’s sickness worsens, the Hunter will uncover the sad reality of Gilbert’s fate. When the Hunter returns to the Central Yharnam lamp after killing Rom, they will discover a Beat Patient outside Gilbert’s house. This is Gilbert, and sadly we can see he has succumbed to his sickness. When we approach his window, which is now shattered, we can confirm this to be Gilbert. Killing the deformed Gilbert will grant the Hunter the Clawmark Rune.
Iosefka

- Location: Iosefka’s Clinic
- Items: Iosefka’s Blood Vial, Oedon Writhe Rune, Cainhurst Summons, One Third Umbilical Cord
- Quest: Yes
Iosefka herself is a very caring nurse who intends to look after the sane residents of Yharnam. The first time the Hunter encounters Iosefka, she is behind the door leading to her Clinic. She will refuse to open the door for us because we are engaged with the Hunt, however, she is sure to tell us that she is praying for our safety. She will also give us an item called Iosefka’s Blood Vial, which heals 75% of your total HP. This first interaction does not set off any red flags so far, but the Hunter will notice a sinister change when we come back after defeating Father Gascoigne.
Returning to the door to Iosefka’s Clinic, we can talk to her again. However, when we listen to her dialogue, the Hunter will notice that she sounds very different compared to the first interaction. This is because an Imposter has replaced Iosefka. They will now ask you to send anyone I come across to her Clinic. If the Hunter doesn’t notice that Iosefka has been replaced, this can seem like a harmless gesture of kindness.
Sending characters you meet to Iosefka’s Clinic will be sending them to their demise. This Imposter Iosefka will turn human NPC’s into Celestial Beings, experimenting on the few remaining souls in this decrepit town. Players must work through the Forbidden Woods to access her Clinic and stop this madness.
If Iosefka is visited before killing Rom and bringing on the Blood Moon, the Hunter can stop these experiments before it’s too late. This will result in a thrilling battle with the imposter, where they will use Arcane spells seen in the Micolash battle. This will have her drop the Odeon Wraith Rune, and the Hunter can also find the Cainhurst summons within the Clinic.
If the Hunter is too late and finds the Clinic after killing Rom, the Imposter Iosefka will have completed her mission. She is found on all fours atop a stretcher, writhing in pain, soaking in the glory of her success. Killing her now will give the Hunter a One-Third Umbilical Cord, which is essential to achieve certain endings.
Eileen the Crow

- Location: Central Yharnam, Cathedral Ward, Tomb of Odeon, Grand Cathedral
- Items: Crow Hunter Badge(Crowfeather Set, Blades of Mercy), Hunter Caryll Rune, Bold Hunters Mark
- Quest: Yes
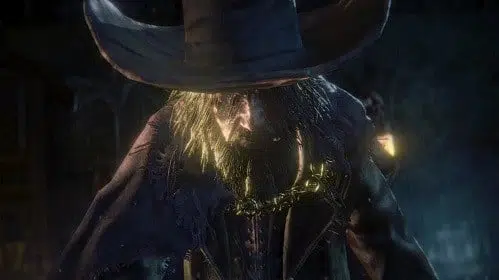
Eileen the Crow is one of the most compelling characters in Bloodborne. She is the leader of the Hunter of Hunter Covenant, and if you engage with her questline, you will join her for many of these Hunts. She is an outsider to Yharnam, just like us, and is a silent killer who methodically stalks her prey. If her questline is done out of order, she will become our enemy, and this fight is a brutal one.
We first encounter her within Central Yharnam, past the dog cages and through two barrel-covered entrances in the building connecting to the sewers. She will ask us to assist her in fighting a Hunter named Henryk in the Tomb of Odeon. If you are looking to complete her questline, you must help her do this before you enter the Forbidden Woods, or else it will be you that Eileen is hunting down.
Killing Henryk with Elieen without her dying will allow you two to continue the Hunt. After killing Rom, you will have one final task to do. However, it is not an easy challenge. You will need to solo battle the last hunted, the Bloody Crow of Cainhurst, who is regarded by some to be the most demanding boss in the base game.
This battle takes place in the Grand Cathedral, and on your way up, you will find Eileen lying in a pool of blood atop the steps. She has failed her first battle with the Bloody Crow, however, she tells us to stay back. We cannot do that, and the Hunter presses on to avenge Eileen. You will be awarded the Hunter Caryll Rune if you overcome this brutal battle.
Walking back to Eileen shows that her state has worsened, although she is quick to deny it. She admits that the Hunting of Hunters’ life sin;t for her anymore, and she will give us the Crow Hunters’ badge. She thanks us for saving her life, and she slowly yet peacefully drifts away to her death, away from this never-ending Nightmare.
Alfred

- Location: Cathedral Ward, Cainhurst
- Items: Wheel Hunter Badge (Logarius’ Wheel, Golden Ardeo), Radiance
- Quest: Yes
Alfred is a Vileblood Hunter, a member of the Healing Church, and, more specifically, an Executioner. He hunts the Vileboods because they betrayed the Healing Church and ran off to Cainhust with the Church’s blood. Alfred is forever seeking a path to this secret Castle and wishes to kill Queen Annalise of the Vilebloods. His smaller group, known as the Executioners, all share the same common goal of destroying the Vilebloods.
We first find him in a remote area in Cathedral Ward, where he asks that you share the location of Cainhurst Castle with him. This is because he seeks to invade the Castle, kill the Queen, and give Martyr Logarius a proper, honorable death. Once we make it to Cainhurst, we can return to Alfred and give him the location.
Once you have given Alfred the Cainhurst Castle location, we can find him in the throne room of Queen Annalise, drenched in blood while rambling in a manic state. He goes into graphic detail about how he punished the Queen and didn’t even notice you until he was done rambling and laughing. He will thank you for helping him with this task, although you may feel different seeing the result. If you kill him here, he will drop the Radiance Rune, increasing the amount of health received per blood vial.
Annalise, Queen of the Vilebloods

- Location: Cainhurst Castle
- Items: Corruption Oath Rune, Cainhurst Badge
- Quest: Yes
Annalise, Queen of the Vilebloods, is one of the few surviving Vilebloods left. Since they betrayed the Healing Church by stealing blood, Queen Analise and the Vilebloods have been the main targets of a group called the Executioners, a subsection of the Healing Church. Queen Analise is hidden away in Forsaken Castle Cainhurst, only accessible after defeating Martyr Logarius and wearing the Crown of Illusions. Only this way will the Hunter be able to approach the Queen.
We find her in a grand room filled with hundreds of statues lining the walkway to her. Here she sits, waiting for you to kneel for her. Once you kneel, she will begin addressing you, asking you to swear an oath to the Vilebloods. After exhausting her dialogue, she will grant you the Corruption Oath Rune and the Cainhurst Badge. She asks you to bring her Blood Dregs, which she will use in the hopes of bearing a child.
If you follow Alfred’s quest line entirely, and Queen Annalise is killed by him, you can bring her back to life. Collecting the Queenly Flesh on her corpse and bringing it to the Altar in the back of the Ebrietas boss arena. Here, you can offer the flesh to the Altar, which will result in a text box popping up saying,
“Time flows in reverse for this scrap of flesh.”
The Queen’s immortality leads us to believe that the Vilebloods have some connection to the Great Ones, but for now, that is just speculation.
Provost Willem

- Location: Byrgenwerth
- Items: 2545 Blood Echoes, Eye Rune
- Quest: No
Provost Willem is the head of the Byrgenwerth academic institute, a branch of the Healing Church. Willem attempted to reach a higher intellectual state, similar to the Great Ones. He was close with many scholars, namely Laurence, who all initially bought into the same idea.
Ultimately, Byrgenwerth is abandoned by all but Willems most loyal scholars, but Laurence was one of the scholars to leave. This was due to a difference in ideology between the scholars, and we get insight into this with the cutscene after the Vicar Ameilia battle. This cutscene is a conversation between Willem and Laurence, where Willem confronts him about abandoning the Church. As Laurence leaves, Willem gives him a stern, memorable warning.
“Fear the Old Blood”
When we find him in Byrgenwerth, he is bound to his wheelchair, unable to speak. He can only point to the lake, which serves as our clue as to how we can access the Rom fight. Killing him will give us 2545 Blood Echoes and the Eye Rune; aside from that, there is not much more than Willem can offer us.
Gherman
?file=Image-bloodborne-c01.jpg)
- Location: Hunters Dream
- Items: Old Hunter Badge(Burial Blade, Gherman Garb)
- Quest: Yes
Gherman is our mentor in the Dream, however, we are not the first Hunter he has guided through the Nightmare. Gherman is bound to the Dream, eternally serving as the mentor for Hunters as they hopelessly attempt to uncover the secrets of Yharnam. Once a Beast hunter himself at the start of the outbreak, he developed his Burial Blade and inspired a line of weaponry called ‘trick weapons,’ which we use in our battles too.
He is implied to have been a Hunter for the Healing Church, and his creations were so vital to their operations that they gave him the ‘job’ of working in the Hunters Workshop, an exact copy of the Hunters Dream found in the Waking World.
He grew fond of a student named Maria, the boss we fought in the Astral Clocktower when he was a student. She left college to pursue her studies, which we know are the experiments in the Fishing Hamlet disaster. Gherman grew lonely, stuck in an eternal loop with no company. This is why the Doll is with him in the Dream, as he constructed her to resemble Lady Maria so that he could be in the company of the love of his life.
When we kill Mergo’s Wet Nurse and return to the Dream, we see it has gone up in flames. The Doll tells us to meet Gherman by the foot of the Great Tree, and here he will give us a choice to be killed by him, ending this Nightmare for us. If we refuse, we will have to battle it out with our mentor in a fight to determine who frees who.
Killing Gherman is a service to him, as his never-ending sadness is over, and he can die peacefully. We then can take his place, serving as the mentor for Hunters for the foreseeable future.
Plain Doll

- Location: Hunters Dream
- Items: None
- Quest: No
The Plain Doll is a creation of Germans, serving as his companion in this eternal Nightmare. The Doll will not be alive when the Hunter first encounters her. However, with one insight, the Doll is brought to life.
We mainly use the Doll to level up with Blood Echoes; throughout the game, she will encourage us to keep going and pray for our safety. She is our one true friend in Bloodborne and always brings a feeling of safety and security.
She was made to resemble Lady Maria, Ghermans love that he will never be with again. Her joyful attitude is manufactured, and she recognizes this fact. In one quote, she says to us,
“But… do the gods love their creations? I am a doll, created by you humans. Would you ever think to love me? Of course… I do love you. Isn’t that how you’ve made me?”
We can find her natural ‘body’ in the Waking World, on the ground in the hidden Hunters Workshop area. It is a sad existence for the Plain Doll, however, she is with us until the end. If you choose to battle Gherman, regardless of the two endings you receive, the Doll will be with us until the end, being our loyal helper in this World of darkness.
Patches the Spider

- Location: Lecture Hall, Nightmare Frontier
- Items: 5453 Blood Echoes, Great One’s Wisdom, Anti-Clockwise Metamorphosis Rune
- Quest: No
Patches is a recurring character in the Soulsborne series, and in Bloodborne, Patches appears in spider form. He is a cunning, devious NPC across all titles, always looking to trap the player in terrible situations. While he is seen as a foe to many, if you befriend him, he will become a merchant where you can purchase items. Granted, these items are sold at a much higher price.
When exploring the Nightmare Frontier, Patches will attempt to throw you down into a pit using a simple plan. If you see a trail of coins leading towards a glowing treasure, you will know that Patches is nearby. Grabbing the item will initiate a cutscene where Patches knocks you into a poison pit below, laughing the whole time.
If you are a keen Hunter, you will notice that he can be seen perched up against the side of a cliff, waiting for you. Shooting or hitting him with anything will lead him to drop down into the poison pit, falling victim to his trickery. Love or hate him, Patches is always a welcomed sight, much like an annoying younger sibling.
Retired Hunter Djura

- Location: Old Yharnam
- Items: Powder Keg Hunters Badge
- Quest: No
Retired Hunter Djura is the protector of the Beasts, sitting atop the tower of Old Yharnam with a Gatling gun. As you enter Old Yharnam, he welcomes you but warns against harming the beasts in this land. Of course, we will take down any beasts in our way. This will result in Djura shooting you whenever you are visible with a barrage of bullets, causing you to resort to stealth.
Working your way up to Djura will have him battle you atop the tower. Killing him will drop the Powder Keg Hunters badge, allowing you to access his weapons. If you want to befriend him, this is a possibility but will take some work.
After you kill the Blood Starved Beast and Darkbeast Paarl, make your way back to Djura, but do not kill any beasts. Making it up to him will result in him approaching you and having a friendly dialogue. Djura was a skilled Hunter in his time and the only one that developed an empathy for the beasts. This led him to run away to Old Yharnam, constantly protecting the Beasts from outsiders.
Valtyr

- Location: Forbidden Woods
- Items: One Eyed Iron Helm
- Quest: No
Valtyr is the Master of the League, a covenant in the Bloodborne Universe. He waits for you in the Forbidden Woods, in the shortcut elevator to the right of the first lantern. Talking to him will result in him asking you to join his covenant, where you are to give him vermin collected from corpses. He used to eat the bodies of beasts he slaughtered, giving him the nickname ‘Beast Eater.’
Characters in NPC Hub Area
The following NPCs are part of the NPC hub area in Cathedral Ward. Found in separate regions of the map, they can all be brought back to Cathedral Ward as friendly NPCs.
Lonely Old Woman

- Location: Central Yharnam
- Items: Sedatives
- Quest: No
This Lonely Old Woman is an NPC found in the houses of Central Yharnam. Talking with her and sending her to Cathedral Ward will result in her taking a spot in the central hub, safely relaxing while we take on the Beasts. She will frequently give us Sedatives whenever we talk to her, but taking too many can result in her death.
Taking her Sedatives three times will cause her to go out and look for more sedatives in the World. When she returns, she will offer another Sedative to you. Accepting this will lead her to search again, and sadly she is murdered on this venture.
Oedon Chapel Dweller

- Location: Oedon Chapel
- Items: Pebble, Formless Oedon Rune
- Quest: Yes
The Oedon Chapel Dweller is an awkward, nervous NPC that will take lodging in the Cathedral Ward. Talking to him will result in him asking you to gather other NPCs from around Yharnam and to bring them back here to give him company. While he may not be the most significant character in Bloodborne, he can be credited with the gathering of humans in the Oedon Chapel.
Killing him will drop you the Formless Oedon Rune, and he will give you a pebble in conversation when he is alive. It is easy to be creeped out by this guy based on his appearance, but I feel empathy towards an innocent, awkward survivor.
Arianna, Woman of the Night

- Location: Cathedral Ward
- Items: One-Third Umbilical Cord, Blood of Arianna
- Quest: Yes
Arinana, Woman of the Night, is a prostitute that resides in the lower Cathedral Ward. Sending her to the Tomb of Oedon will have her take up a spot towards the middle. She offers you the Blood of Arianna, which heals you up and boosts stamina for twenty seconds. Keeping her alive is necessary because she holds the baby of a Great One. To do this, remove the blood from your inventory so that Adella will not kill Arianna.
If Arianna is kept alive after defeating Micolash, you can find her in the sewers below Cathedral Ward. She has given birth to a creature, and killing that creature will provide the Hunter with a One-Third Umbilical Cord.
Adella the Nun

- Location: Hypogean Gaol
- Items: Blood of Adella
- Quest: No
Adella the Nun was a nun of the Healing Church who was kidnapped by the Snatchers and brought to the Hypogean Gaol jail. When you find her, you will need to wear garb associated with the Healing Church, allowing you to send her to the Cathedral Ward hub.
She will remain in the hub, sitting in the back right corner. She has to be kept in check, however, as she is very jealous of the attention that we are giving Arianna. This is likely because the nun lifestyle greatly disapproved of Arianna’sArianna’s profession, and if we give Arianna too much attention, Adella will kill her. If you attempt to destroy the Moon Presence, you should kill Adella before she gets jealous and kills Arianna, as Arianna drops the One Third Umbilical Cord.
Suspicious Beggar

- Location: Forbidden Woods
- Items: Beast Rune, Beast Blood Pellets, Pungent Beast Blood Cocktails
- Quest: No
The Suspicious Beggar is an older man found deep within the Forbidden Woods. He is standing over a few mauled bodies and will ask you if you are responsible for killing the Snake Parasite. He will also ask if there are any safe places to go, and if you say yes and send him to Cathedral Ward, he will give you two Pungent Beast Cocktails.
This is a bad idea, as this Beggar is an Abhorrent Beast in disguise. You can expose this immediately in the Woods by attacking him, causing him to shift into his proper form and attack. If he goes to the Cathedral Ward, he will slowly kill all the NPCs until you finally confront him and battle it out.
Skeptical Man

- Location: Cathedral Ward
- Items: Pungent Blood Cocktails
- Quest: No
The Skeptical Man can be found in the Cathedral Ward streets and is indeed skeptical. He will ask if you know any safe places to go and will go to the opposite place you said. So, if you tell him to go to the Cathedral Ward hub, he will most likely go to Iosefka’s Clinic. If he goes to the Cathedral Ward hub, he will constantly tell you the opposite of his true feelings about the NPCs. He talks in riddles and negatives and is an interesting character in the hub.
An immense number of NPCs in Bloodborne work together to give Yharnam life and hide the many secrets that this World has to offer. All the questlines they offer can become a confusing maze of back and forth, but the rewards ultimately make an effort worth it most of the time.