- Bloodborne Moonlight Greatsword Guide - September 8, 2022
The environments of Bloodborne are my favorite parts of the game, in all honestly.
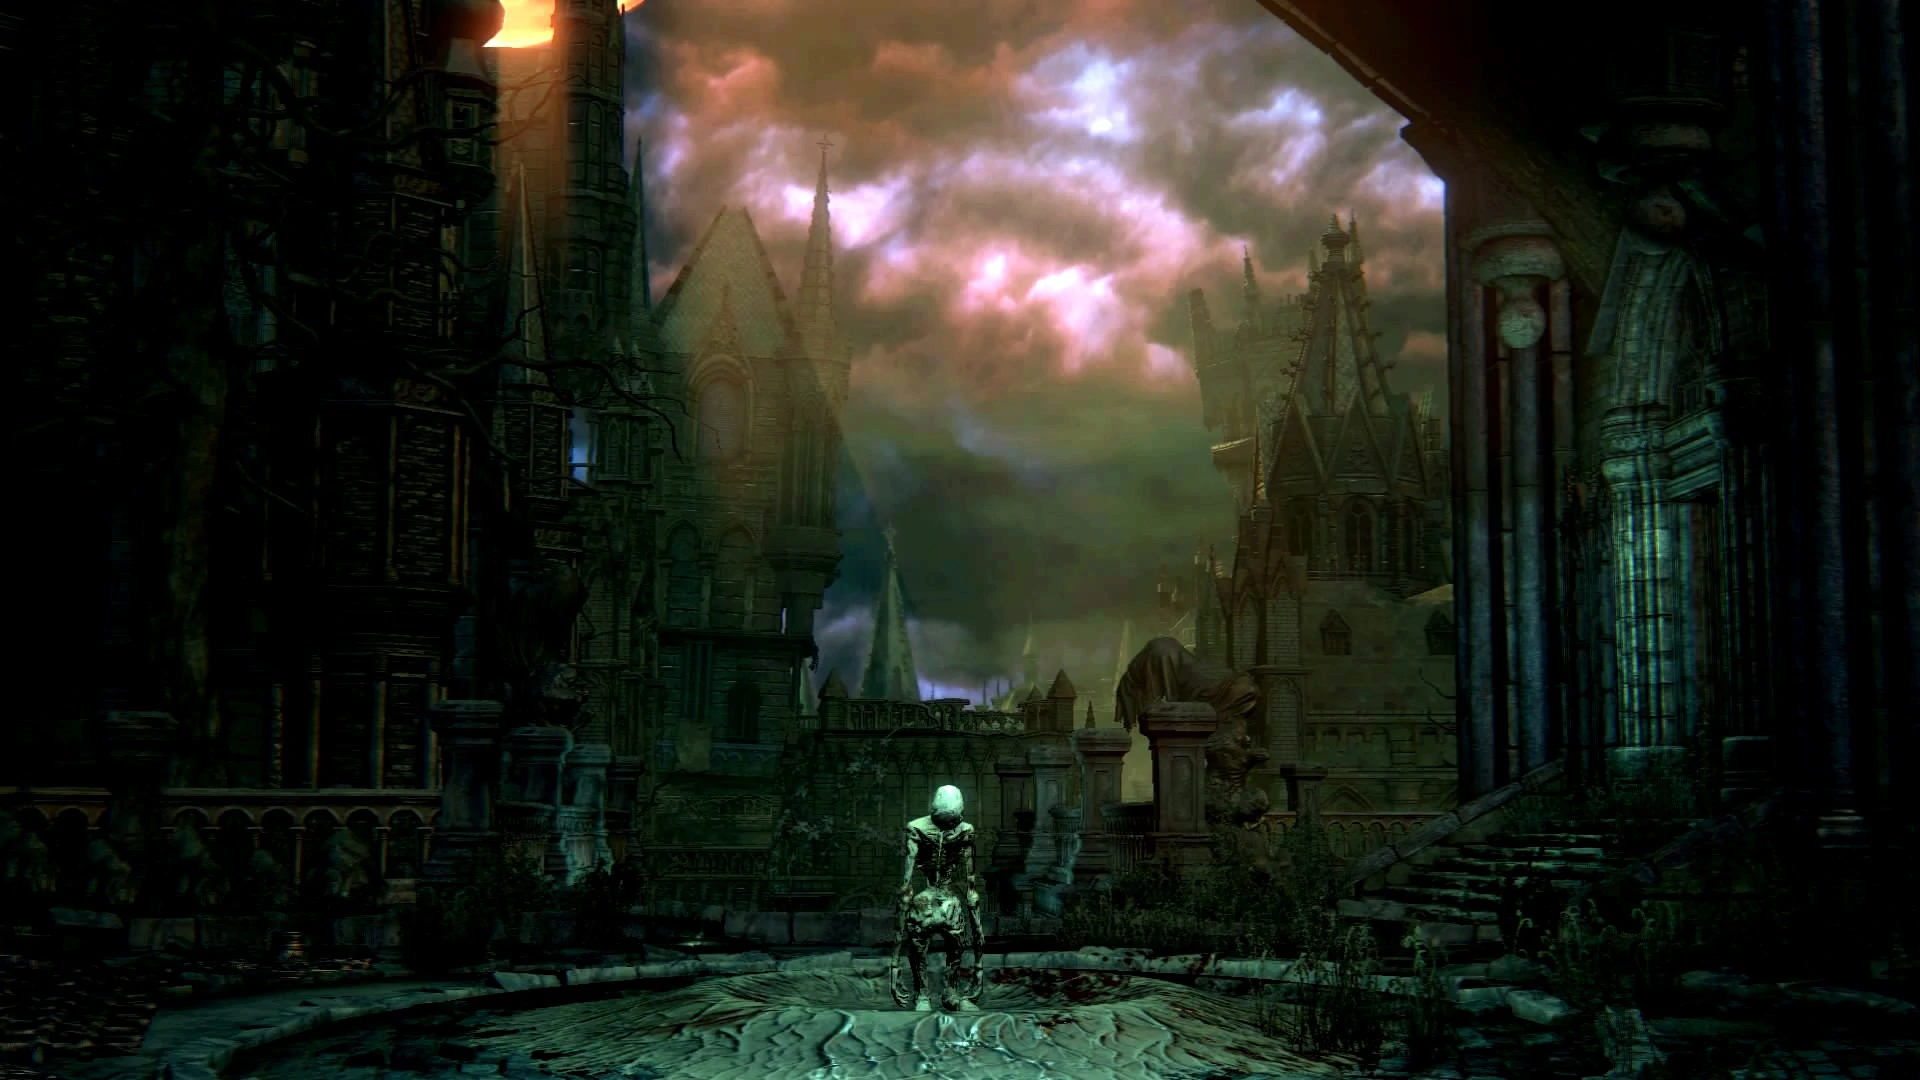
While the gameplay, combat, and plot are essential, the different locations you visit during the game truly bring it all together. The dark, poorly-lit environments and gothic, Victorian-era-style buildings make the action RPG iconic at first glance. But as you further progress in the game, the more the locations differ more vividly, truly showcasing some of the type of scenes you’d expect from a horror action RPG.
As I mentioned before, there are plenty of locations that you’ll visit throughout your journey through Bloodborne, but arguably the most important would be the Hunter’s Dream. A haven from the tribulations of the outside world, a place where a hunter can rest their weary bones, mend their weapons and clear their mind.
From this location, you can travel to different places via the Awakening Headstones that line stairs up towards the Hunter’s Workshop.
- The Hunter’s Dream
- The Yharnam Headstone
- The Frontier Headstone
- The Unseen Headstone
- The Nightmare Headstone
- The Old Hunter’s Headstone (DLC)
The Hunter’s Dream

This place will serve as your base throughout your adventure in Bloodborne, as I mentioned before. There are no enemies here, so feel free to let your guard down.
There’s no way to travel to Hunter’s Dream without dying first, but since this Bloodborne, that won’t be much of a problem. After falling in a battle for the first time, your Hunter will awaken in the Hunter’s Dream, a place that is almost in stark contrast to the dimly-lit city of Yharnam.
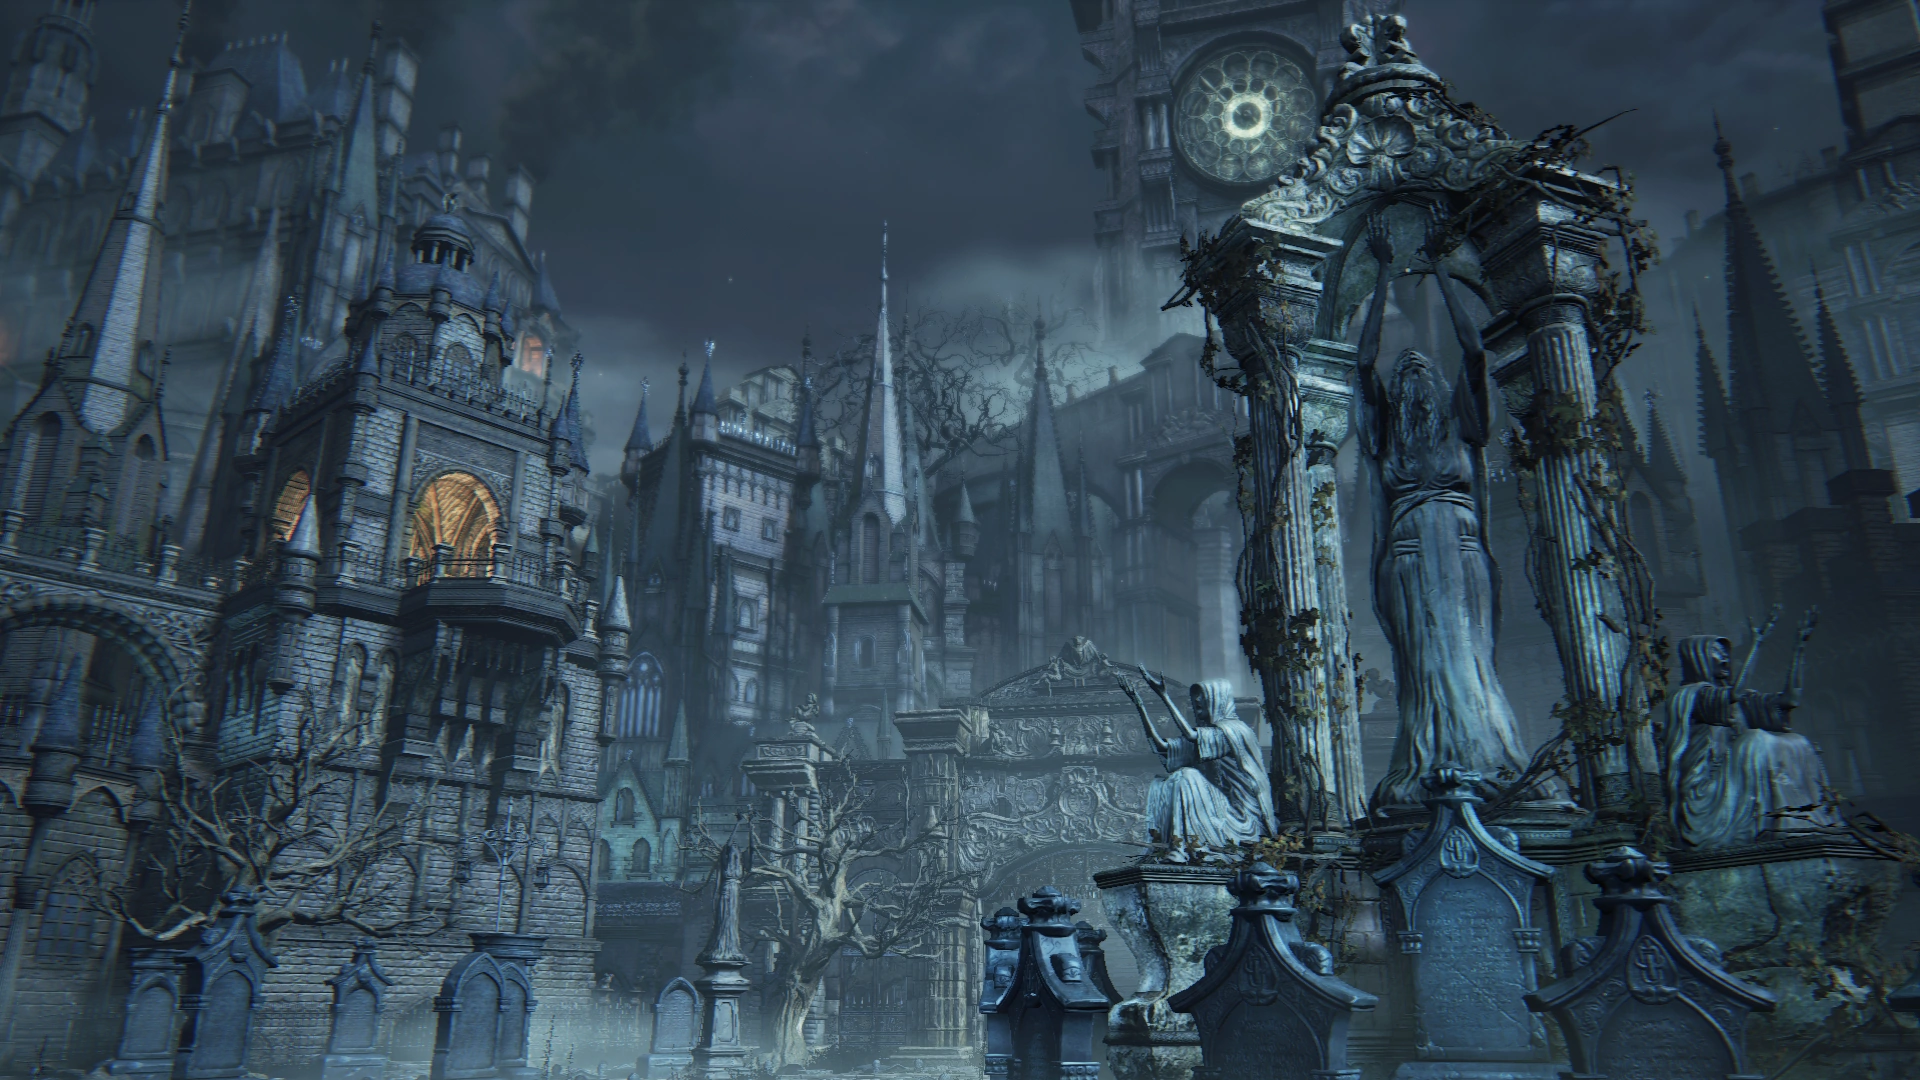
The Hunter’s Dream seems to be a cemetery of some sort. It is a serene, moonlit area with an abundance of plants, greenery, and gravestones. In the very center of the space sits a medium-sized building. Depending on how far you’ve progressed the plot of the game, Hunter’s Dream will change its appearance:
- During the descent of the Blood Moon, the sky will become a deep blue and will be much clearer.
- After defeating Mergo’s Wet Nurse in the Nightmare of Mensis, The Hunter’s Workshop will constantly be burning; curiously, it won’t disappear or be destroyed.
- When the Moon Presence makes its appearance, the moon in The Hunter’s Dream will turn blood red as the Workshop burns.
- After choosing to wake up from the dream in a previous playthrough, a small gravestone will be erected for your last character in your current playthrough.
After the first cutscene ends, you’ll be able to move about the area freely. The first thing you’ll notice is an inanimate doll sitting just before the staircase up to the Workshop. The Doll is an integral character, but interacting with her will garner no response until you have at least one Insight. You will also be offered a choice of weapons and firearms by the Messengers.
Up the staircase sits the Workshop; here, you can access your storage, apply Caryll Runes to your Hunter and upgrade and infuse your weapons with Blood Gems.
Aside from the Doll, there are a few other NPCs that inhabit this area too:
NPCs
- Gehrman: An old hunter who uses a wheelchair gives you exposition on events during the game. He’s cryptic and seems sympathetic towards you for being caught up in The Hunter’s Dream.
- Gehrman, The First Hunter: After denying his request to stop dreaming, Gehrman will show his true power and face you in battle. Don’t be fooled by his old age; he can move extremely quickly around the arena and hit you with consecutive, heavy-hitting attacks.
- The Moon Presence: A mysterious deity that appears directly after you defeat Gehrman in battle. Very little is known about it other than it is linked to the Blood Moon and possesses otherworldly power.
- The Bath Messengers: A collection of messengers who live in a birdbath. They’re merchants who sell you various valuable items, albeit for a hefty price.
- The Insight Bath Messengers: Like the Bath Messengers, they sell rarer items and equipment for Insight instead of Blood Echoes.
- The Stump Messengers: Like the other Messengers, the Stump Messengers sell you items. These items are mainly just cosmetics, like Top Hats or Ribbons.
The Yharnam Headstone

The Yharnam Headstone is the first Awakening Headstone that you’ll have access to; interacting with it will allow you to travel to various lamp locations within Yharnam:
Iosefka’s Clinic
A clinic that is run by a woman named Iosefka. She cares very deeply about all of the patients that arrive in her clinic and refuses to expose them to the outside world. Oddly enough, she doesn’t make a physical appearance until much later in the game. This is also the first place you can explore upon starting Bloodborne for the first time.
After defeating Father Gascoigne and heading back to the clinic, Iosefka will have locked the main entrance, preventing you from getting inside. She will ask you to send any surviving people to her clinic, promising to look after them during the Night of the Hunt. Be aware that any NPCs you send here will not be the same ever since they will be killed or transformed into Celestial Beings.
You can also take a back entrance to the clinic by heading through the Forbidden Woods. Once you reach the abandoned village section of the area, you can find a cave with a ladder leading directly into Iosefka’s Clinic.
You can face Iosefka in battle after coming through the back entrance of the clinic; if you try to do this after the descent of the Blood Moon, you’ll be able to find Iosefka in a room, slowly going insane. If you kill her here, she will drop a Third of Umbilical Cord, an essential key item to achieve one of the three endings.
There are some other items that you can pick up in this area as well:
- Cainhurst Summons: A letter addressed to you, granting an audience at Cainhurst Castle.
- Communion: A Caryll Rune that lets the Hunter carry more blood vials than usual.
- Iosefka’s Blood Vial: A vial of Iosefka’s blood, rare and few. Restores a large amount of HP.
Lamps Locations
- 1st Floor Sickroom
Central Yharnam
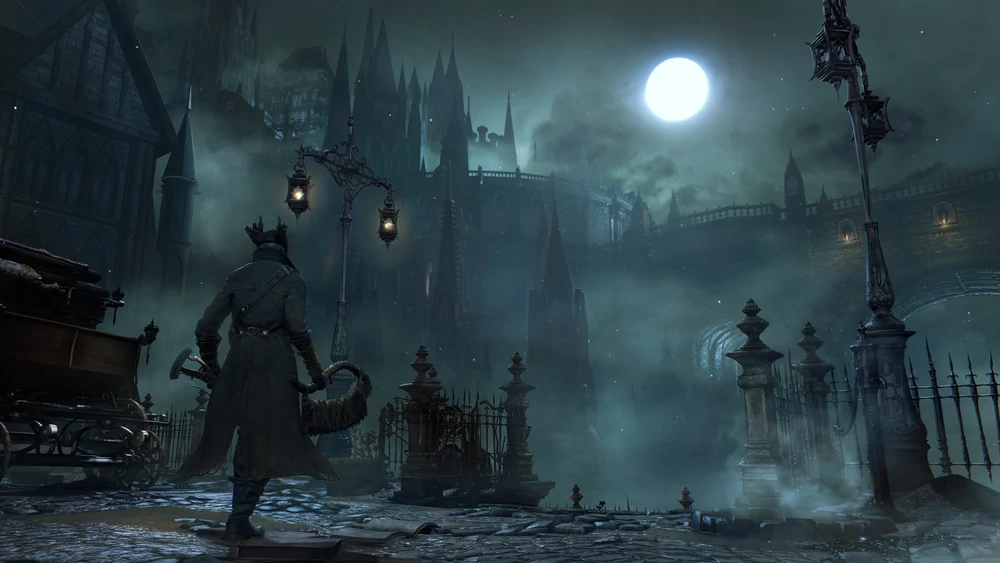
A giant, sprawling maze of dark back alleyways and tall, Victorian-style buildings. This is the first area you’ll get to explore, and it’s teeming with enemies and items ripe for the taking. There are two bosses in this area, The Cleric Beast and Father Gascoigne. Taking on the Cleric Beast is optional, but it drops the Sword Hunter Badge on death, so I think it would be worth taking it on. Father Gascoigne is a mandatory boss, so you’ll have no choice but to take him on.
Since this area is such a maze, it’s easy to miss essential NPCs and items. I recommend going out of your way to explore every corner you come across; you’ll never know who or what you’ll come across:
NPCs
- Eileen the Crow: An seasoned hunter who dons a raven-like mantle and a plague doctor’s mask. A woman shrouded in mystery who calls herself a hunter of hunters.
- Henryk: A hostile old hunter who has lived for an extremely long time; he’s wholly aggressive and drunk on blood by the time you meet him.
- Lonely Old Woman: An angry older woman who has a strong hate for hunters and an addiction to Sedatives.
- Viola: A little girl closely linked with Father Gascoigne. She will give you the Tiny Music Box if you visit her before defeating him.
- Gilbert: A fellow outsider who traveled to Yharnam to try and heal his incurable disease. He will give you little bits of information about the Healing Church and Central Yharnam.
Useful Items
- Blood Gem Workshop Tool: A unique tool that allows hunters to affix Blood Gems to their weapons.
- Saw Hunter Badge: A special badge that allows you to purchase several useful weapons and firearms from the Bath Messengers, such as the Threaded Cane and Blunderbuss
- Torch: A simple torch that is brilliant at keeping beasts at arm’s length.
- Saw Spear: A special transforming weapon that can switch between a spear and a serrated saw.
Lamps Locations
- Central Yharnam
- Great Bridge
- Tomb of Odeon
Cathedral Ward
Cathedral Ward is a handy location as it has a few alternative routes and a hub for any NPCs you find. You can enter the Ward just after defeating Father Gascoigne. There’s one boss to take down in this area, Vicar Amelia.
Oedon Chapel is one place you’ll visit a lot during your time in Cathedral Ward since any surviving NPCs you find out in the world can be sent here. Just chat with the Oedon Chapel Dweller first and exhaust his dialogue.
You can choose to explore Catherdral Ward more if you want to, but I recommend traveling to Old Yharnam or the Healing Church Workshop as soon as you get the chance. The Workshop houses some handy items, and Old Yharnam allows you to meet the eccentric character, Old Hunter Djura.
NPCs
- Oedon Chapel Dweller: Although he looks terrifying, this character is truly a gentle soul. His only wish is to help the surviving NPCs you send to him at Odeon Chapel.
- Arianna the Prostitute: Arianna is a woman who resides in Cathedral Ward; after defeating Vicar Amelia, you can send Arianna to Oedon Chapel to obtain her blood.
- Alfred: A rather polite hunter you come across in Cathedral Ward, he started as a hunter but has now dedicated his life to following a man called Martyr Logarius.
- Narrow-Minded Man: As the name suggests, this man is extraordinarily pessimistic and will do the opposite of what you tell him. Maybe everything he says is the opposite of what he thinks as well.
- Lesser Amygdala: A nightmarish creature suspended on a building in Cathedral Ward. It is invisible to the Hunter until Rom, the Vacuous Spider, is defeated or if the Hunter has 40+ Insight.
Useful Items
- Fire Paper: A consumable item that buffs your melee weapon with additional fire damage.
- Tempering Blood Gemstone: Improves the damage of whatever weapon it is attached to.
- Monocular: A tool that allows you to spot objects closely from far away.
Lamp Locations
- Cathedral Ward
- Grand Cathedral
Old Yharnam
A long-since abandoned section of the city, nothing resides in these burning, ruined remains apart from beasts and aggressive hunters. This area is vast and has tons of places to explore, but it is also teeming with enemies who are more than capable of swarming and stun-locking you to death.
There are two bosses for you to defeat in this area, Darkbeast Paarl and the Blood-Starved Beast. Neither of these bosses is mandatory, but if you’re looking to get your hands on loads of Blood Echoes or rare items, you will do well to seek them out actively.
The Old Hunter, Djura is one character you cannot ignore during this area; he will warn you to turn back when you first enter Old Yharnam and will then relentlessly fire at you with a Gatling gun from on top of a tall tower. You’ll have to strategically avoid his gunfire whilst fighting off groups of blood-thirsty enemies.
NPCs
- Old Hunter Djura: Although he is initially hostile, you can befriend Djura by entering Darkbeast Paarl’s boss arena for the first time and then instantly leaving via the Bold Hunter’s Mark.
Useful Items
- Beast Pellets: A rare consumable that boosts the user’s attack power with every hit.
- Rifle Spear: A spear that can shoot bullets.
- Thick Coldblood: A consumable that grants several Blood Echoes upon use.
Lamp Locations
- Old Yharnam
- Church of the Good Chalice
- Graveyard of the Darkbeast
The Healing Church Workshop
The Healing Church is a prominent figure in Yharnam, and many believe that this is where this entire nightmare began. Aside from a few belligerent townsfolk and the Abandoned Hunter’s Workshop, there’s not much here. There are no bosses nor NPCs to speak of.
The Abandoned Hunter’s Workshop can be found by heading into the lower-middle section of the tower and then carefully dropping down onto the crisscrossing beams until you see a doorway.
The Abandoned Workshop is precisely what the name suggests. It is an exact copy of Hunter’s Dream; aside from that, not a single living thing resides here, not even the Bath Messengers. You’ll be able to find the Doll, but she will be utterly devoid of life, unable to say a word.
NPCs
- None
Useful Items
- Old Hunter Bone: A unique hunter tool that allows the user to use the art of Quickening temporarily.
- Third of an Umbilical Cord: A key item essential to achieving one of the game’s three endings.
- Small Hair Ornament: A small comb can be exchanged for a particular, unique Blood Gem.
Lamp Locations
- None
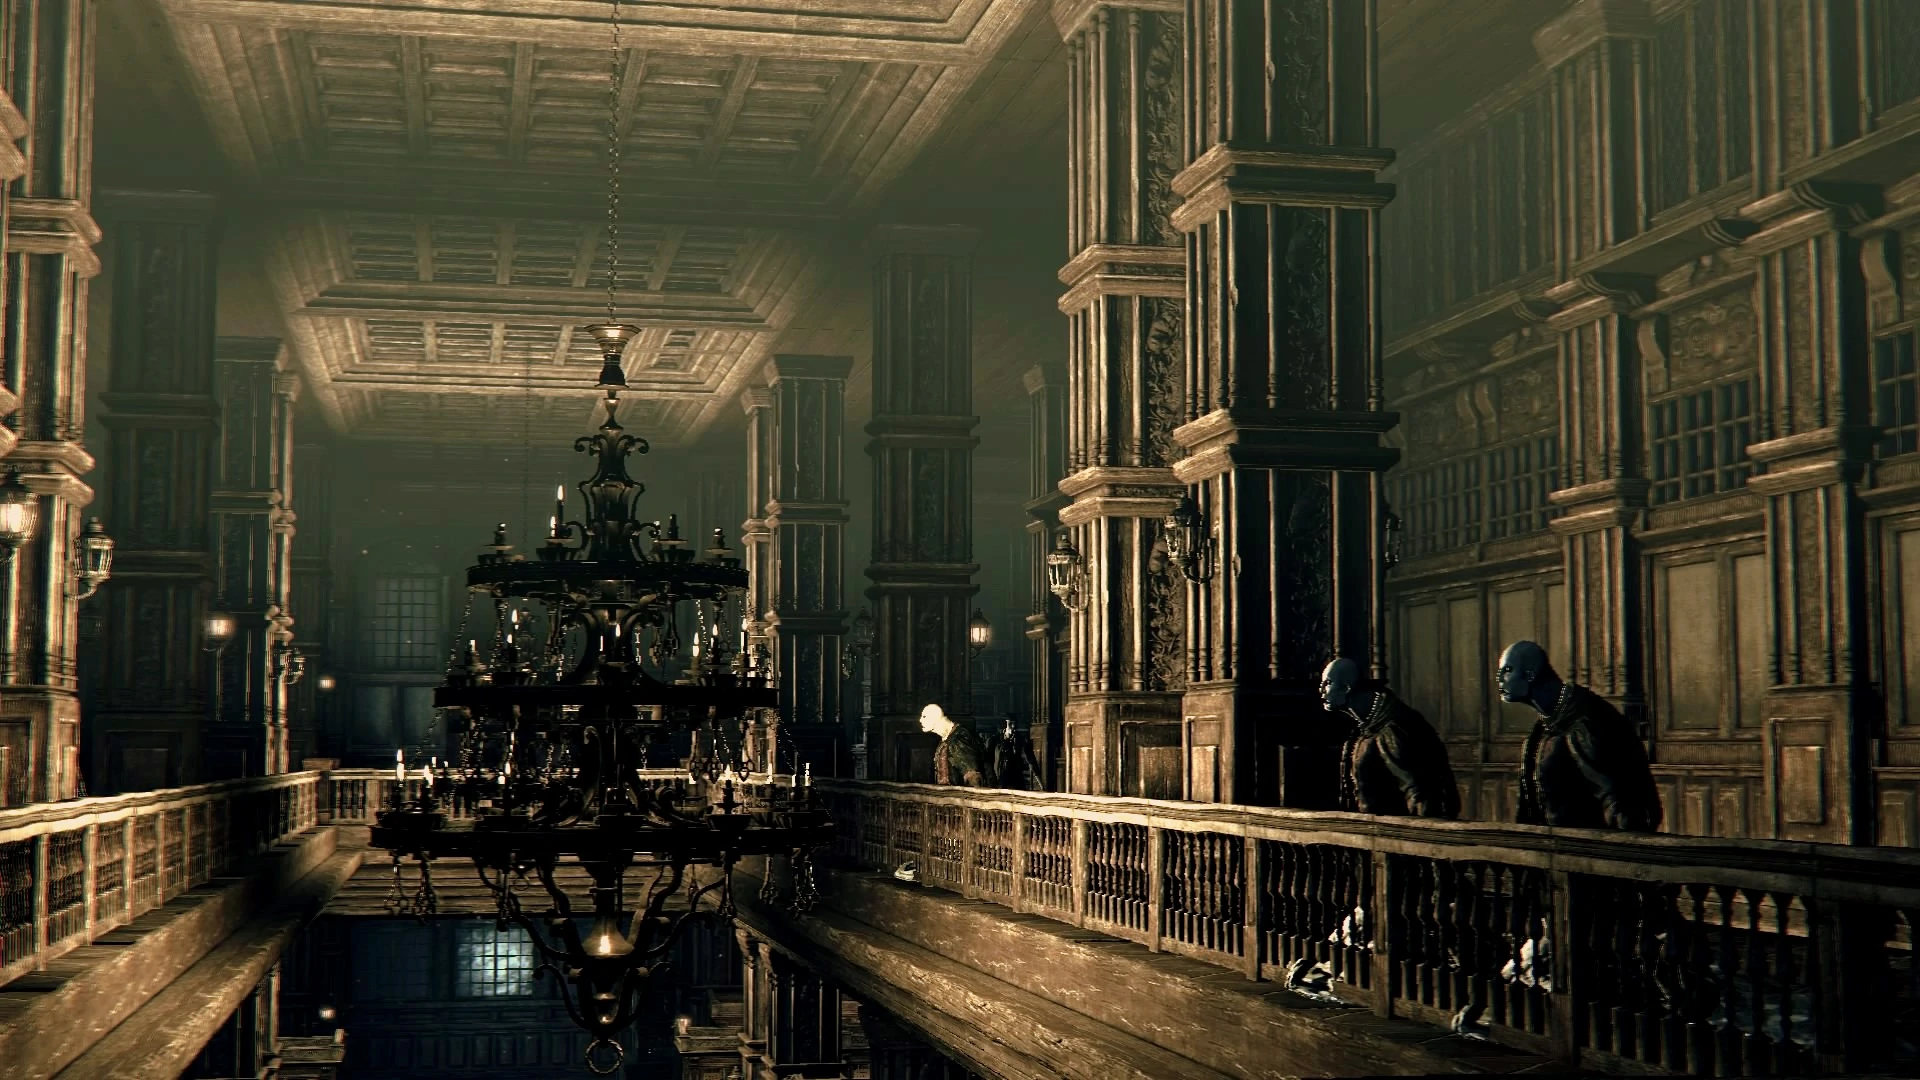
Upper Cathedral Ward
To gain access to this area, you’ll have to obtain the Upper Cathedral Key from Yahar’gul, the Unseen Village. Once you have it in your possession, head to the top of the Healing Church Workshop and unlock the ordained silver door.
Upper Cathedral Ward holds many grim secrets and presents new challenges, such as Ebrietas, the Daughter of the Cosmos, and the Celestial Emissary. These enemies are unlike any you’ve faced before so ensure that your weapons are properly upgraded and infused with powerful Blood Gem; make sure to bring lots of Bolt Paper too!
NPCs
- None
Useful Items
- Orphanage Key: The key to the Orphanage, which is located in the Grand Hall of Upper Cathedral Ward
- Cosmic Eye Watcher Badge: A special hunter badge that unlocks new items to buy from the Bath Messengers, like Poison Knives, Beast Blood Pellets, and Sedatives.
- Great Lake: A Caryll Rune that boosts all defenses of the Hunter equipped with it.
Lamp Locations
- Upper Cathedral Ward
- Altar of Despair
- Lumenflower Gardens
The Frontier Headstone

This is one of the main Awakening Headstones you can interact with within The Hunter’s Dream. You can use it to travel to three central locations.
The Forbidden Woods
Sitting on the city’s outskirts, The Forbidden Woods are dark, dank, and hard to navigate if you don’t know the right path to take. A thin layer of fog seems to linger over the area, making it difficult to see approaching enemies or changes in terrain in the far distance. You’ll deal with humanoid enemies upon entering the woods for the first time, but the deeper you go, the more serpent-like they become.
The bosses of this area are called the Shadows of Yharnam, three humanoid beings that each attack differently. One focuses on melee damage, another focuses on fire and melee, and the last only use fire-based attacks. This will always be a 3-on-1 fight, so time your dodges right, and don’t be afraid to call a temporary retreat if you need to heal.
NPCs
- Valtr: The leader of The League, a covenant that seeks out and destroys Vermin and helps other players through co-op play
- The Beggar: A beggar who can be found on a rooftop, digging through corpses. You can send him to Oedon Chapel or Ioseka’s Clinic. Be wary of him; he seems to be hiding something.
Useful Items
- Clockwise Metamorphosis: A Caryll Rune that boosts the Hunter’s maximum HP when equipped
- Beast Roar: A fist weapon that allows you to move and attack like a beast.
- Blood Rapture: A Caryll Rune that allows you to regain HP from Visceral Attacks (Parry attacks)
Lamp Locations
- Forbidden Woods
- Forbidden Grave
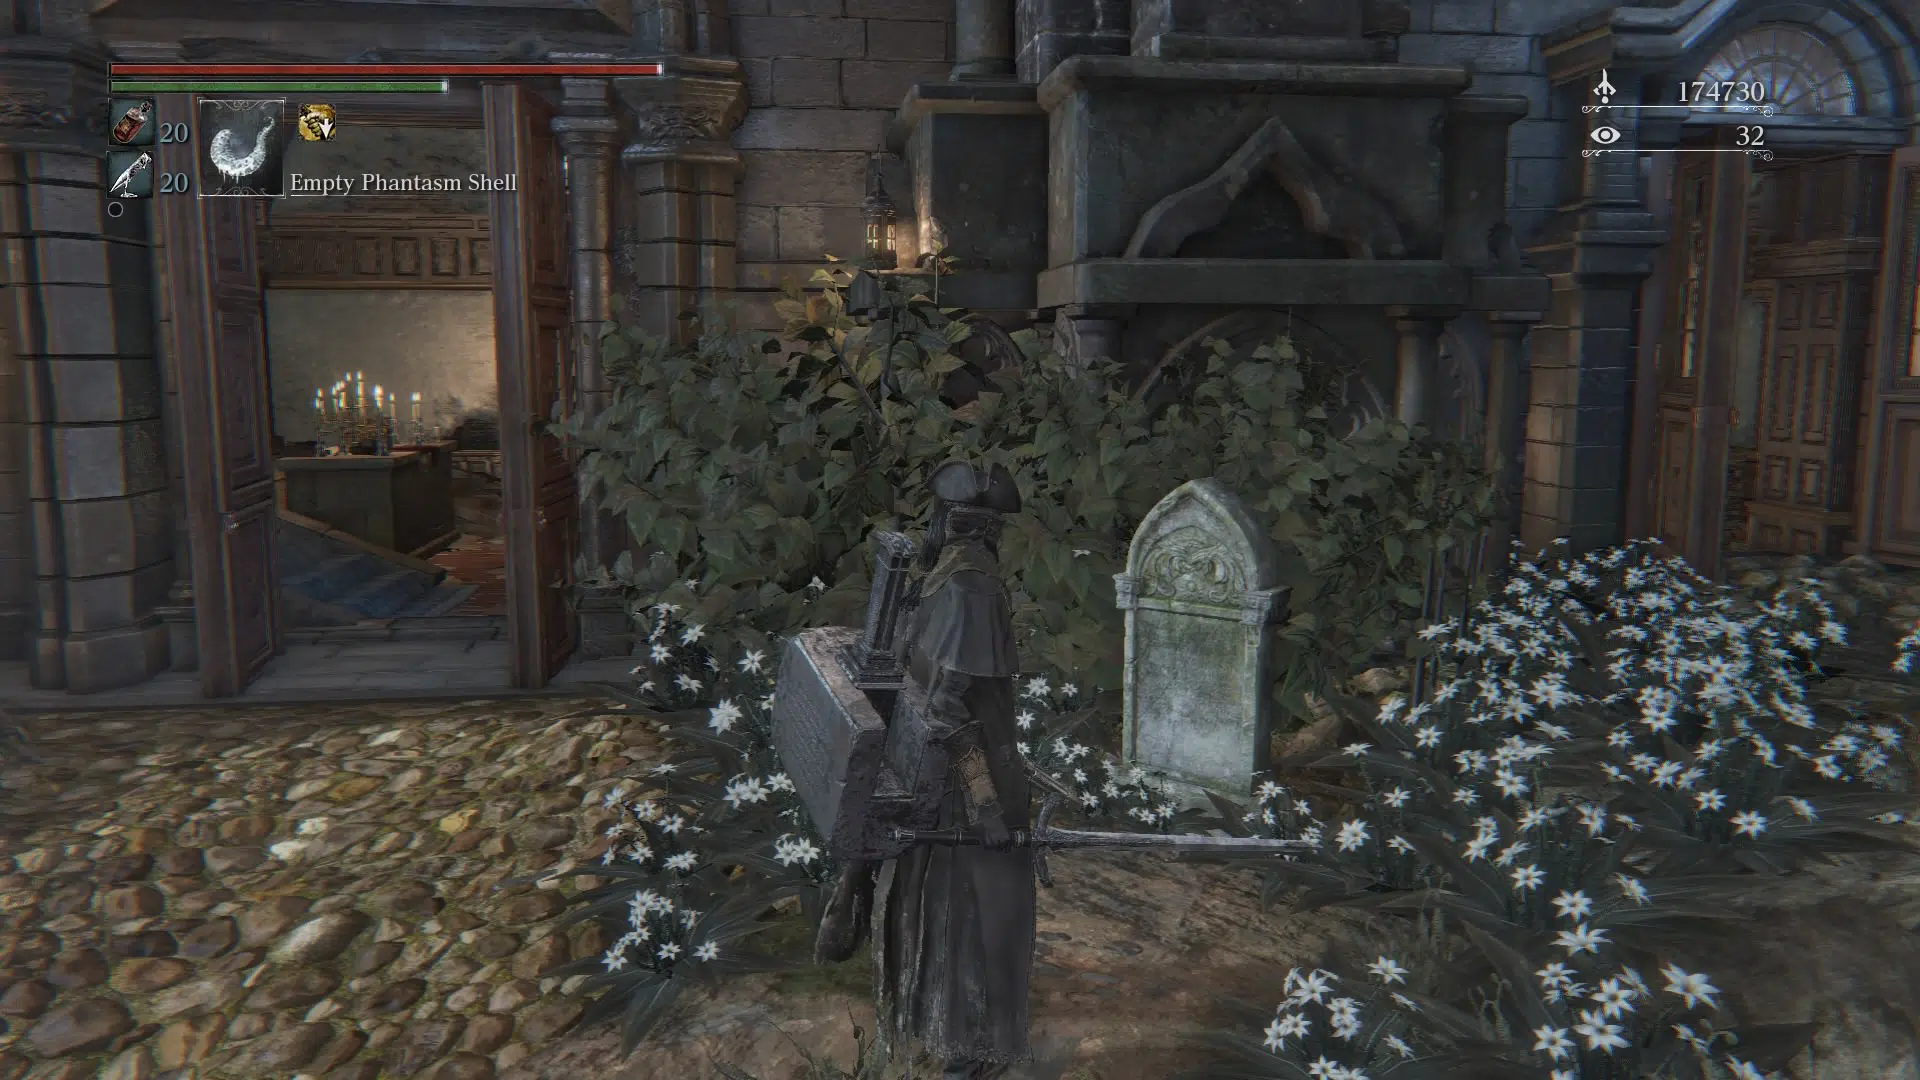
Byrgenwerth
Byrgenwerth is a small area that houses a mansion and a few hostile enemies. This area can be reached by directly following the path from the Shadows of Yharnam boss arena. You’re free to roam outside the mansion and fight any foes you find but try to preserve your Blood Vials; you’ll need them to defeat the hostile Hunter waiting inside the mansion.
There’s only one boss in the Byrgenwerth area, Rom, the Vacuous Spider. This boss is pivotal to the plot of Bloodborne and is mandatory. I recommend using Fire or Bolt Paper on the Spider and capitalizing on defeating the smaller spiders Rom spawns. It will save you a lot of hassle in the long run.
NPCs
Master Willem: A large man who sits in a chair just before Rom’s boss arena. He won’t say a word to you and will only point towards where Rom is.
Useful Items
- Empty Phantasm Shell: A unique hunter tool that temporarily infuses your weapon with arcane damage.
- Arcane Lake: A Caryll Rune that increases your defense from arcane damage
- Eye: A Caryll Rune that boosts Item Discovery of whoever has it equipped.
Hemwick Charnel Lane
This is an optional area that you can go to from Cathedral Ward. You can also travel to Cainhurst Castle from here as well. Hemwick Charnel Lane is a mostly abandoned town filled with predominantly old, crazed women who will attack anything that looks out of the ordinary. On top of this, you’ll encounter tall, shadowy enemies once you gain 15 Insight.
NPCs
- None
Useful Items
- Lake: A Caryll Rune that increases the defense of whoever has it equipped.
- Tempering Bloodstone: A Blood Gem that increases a weapon’s attack power.
- Adept Bloodstone: A Blood Gem that increases the Blunt and Thrust damage of a weapon.
Lamp Locations
- Hemwick Charnel Lane
- Witch’s Abode
The Unseen Headstone
This is one of the main Awakening Headstones you can interact with within The Hunter’s Dream. You can use it to travel to two central locations.
Yahar’gul, the Unseen Village
After taking out Rom, the Vacuous Spider, you’ll automatically be transported to the Yahar’gul. This area is notorious not only for the mind-boggling layout and environmental design but for the spike of difficulty you face. You’ll be taken on many enemies you’ve seen before apart from the Chime Maidens. The Chime Maidens are troublesome enemies that hideaway at the back of rooms or behind corners; they can summon invaders into your world, both actual players and NPCs. These enemies will be a bright red and will not disappear until the Chime Maiden that called them has been dispatched.
There’s one boss in this area called The One Reborn. This fight is somewhat gimmicky as you have to defeat the weaker enemies in its arena before taking on the boss directly. Make sure to bring lots of Fire and Bolt Paper!
NPCs
- Adella, the Nun: A nun of the Healing Church who was kidnapped from Cathedral Ward and imprisoned in the Hypogean Gaol in Yahar’gul.
Useful Items
- Tontirus: A iron mace that excels at conducting electricity and deals Bolt and Blunt damage.
- Heir: A Caryll Rune that increases the number of Blood Echoes you get from killing enemies with Visceral Attacks.
- Upper Cathedral Key: A key that unlocks Upper Cathedral Ward
Lamp Locations
- Advent Plaza
- Hypogean Gaol
- Yahar’gul Chapel
Forsaken Castle Cainhurst
To reach this god-forsaken place, you must first defeat Vicar Amelia, obtain the Cainhurst Summons from Iosfeka’s Clinic, and then get the carriage from Hemwick Charnel Lane.
This area was once a prosperous place for the nobles of Cainhurst, who often traded with Yharnam. After being brought to extinction, the castle is just a ruin, home to the last undying noble, Queen Annalise. This place houses all sorts of unique enemies, like gargoyles and the vengeful spirits of the slaughtered nobles.
The one boss of this area, Martyr Logarius, is a formidable foe. He’s hyper-aggressive and will chase you down. This boss switches between doing melee damage with his long-reaching scythe and using powerful arcane spells at a distance. He also can buff himself and temporarily fly.
NPCs
- Queen Annalise: The last surviving member of the Vilebloods. She can only be reached after defeating Master Logarius. You can join the Cainhurst Vilebloods Covenant by kneeling in front of her.
Useful Items
- Bold Hunter Mark: A consumable item that allows you to return to the last lamp you visited without losing any Blood Echoes.
- Reiterpallasch: A unique sword that can shoot bullets.
- Executioner’s Gloves: A hunter tool that fires three homing skulls at the target
Lamp Locations
- Logarius’s Seat
- Vileblood Queen’s Chamber
The Nightmare Frontier Headstone

This is one of the main Awakening Headstones you can interact with within the Hunter’s Dream. You can use it to travel to three central locations.
Nightmare Frontier
This is where it gets tricky; the Nightmare Frontier is indeed a challenge. The enemies in this place are super-resilient, but they also hit very hard. A simple combo from them can quickly deplete your HP; I recommend killing every foe you come across so that you don’t get swarmed later.
The boss of this area is an Amygdala. Thanks to its multiple long limbs, the creature excels at covering the area with large sweeping attacks. Unfortunately, its weak spots are usually quite hard to hit, so you’ll spend most of the battle hitting one of its legs. Luckily, the Amygdala is vulnerable to Arcane, Bolt, and Fire damage; it also has less health than other bosses.
NPCs
- None
Useful Items
- Stunning Deep Lake: A Caryll Rune that increases the user’s Rapid Poison resistance
- Great Deep Sea: A Caryll Rune that increases the user’s overall resistance.
Lamp Locations
- Nightmare Frontier
- Amygdala’s Chamber
Lecture Building
The Lecture Building is possibly the only relatively normal-looking area in the Frontier Awakening Headstone. It is precisely what it seems, a poorly-lit Lecture Building containing nothing but gangly slime-like students, these guys aren’t much of a challenge, but they do like to hide behind corners and above doorways to ambush you.
There are no bosses in this area as it serves as more of an introduction to the Nightmare of Mensis.
NPCs
- Patches the Spider: No matter what Fromsoft game you play, Patches will always make an appearance one way or another. In Bloodborne, he takes the form of a vast, repulsive spider with a human head. He will promise you great treasure only to betray you at the last moment. If you don’t murder him after escaping his trap, Patches will become a merchant, and a very pricey one at that.
Useful Items
- Anti-clockwise Metamorphosis: A Caryll Rune that boosts the user’s maximum stamina.
- Lecture Theatre Key: A key that grants access to the Lecture Theatre.
- Great One’s Wisdom: A consumable that grants 2 Insight upon use.
Lamp Locations
- Lecture Building
- Lecture Building 2nd Floor
Nightmare of Mensis
You’ve come very far, and here is where you’ll fulfill your destiny as a hunter and slay a Great One.
You’ll encounter a problematic section of the area that requires you to hide behind walls to avoid the light from a Frenzy-inducing lamp whilst also dealing with durable enemies. On the topic of the enemies, this area is a highly challenging area with truckloads of them like the horrific Large Nightmare Apostle or the hideous Winter Lanterns.
Micolash of the Nightmare and Mergo’s Wet Nurse are two bosses in this area. Micolash’s boss fight is gimmicky and revolves around chasing him; you’ll eventually corner the madman in a room and defeat him. You’ll have to take on the numerous mannequins that litter his boss area, though, because if they gang up on you, it’s game over.
Mergo’s Wet Nurse is much more difficult. This boss excels at performing rapid, slashing attacks that can easily stun-lock you. In addition, the Wet Nurse will engulf the entire area in disorienting fog; she will become much more aggressive and spawn clones to catch you off guard during this phase. My advice is to stick to the boss’s back for the entire fight, only running away during the fog phase.
NPCs
- Yharnam, Pthumerian Queen: This eerie-looking woman appeared in the cutscene after you defeated Rom, and this time, she will appear in Mergo’s Loft, staring upwards.
Useful Items
- Blood Rock: An upgrade material used to make weapons and firearms reach +10
Lamp Locations
- Nightmare of Mensis
- Mergo’s Loft Base
- Mergo’s Loft Middle
- Wet Nurse’s Lunarium
The Old Hunter’s Headstone (DLC)
This Awakening Headstone is unique as it allows you to travel to The Old Hunter’s DLC. It can be found towards the back of the Workshop in the Hunter’s Dream. After interacting with these headstones, you can travel to three different locations.
The Hunter’s Nightmare
This area is an interesting sight to behold. The area is similar to Cathedral Ward, but the buildings and layouts are wrong; some sections have nothing in them. It’s almost like somebody was forced to recall the entire area by memory, and they forgot specific details.
You’ll be taking on beasts and hunters alike in this area, the beasts aren’t much to write home about, but the hunters are strong; they wield weapons like the Threaded Cane and the Saw Cleaver. If you underestimate them, it’ll be at your own expense.
There are two bosses in this area, Laurence, The First Vicar, and Ludwig, The Holy Blade. Laurence is a formidable optional opponent that will act similarly to the Cleric Beast, although when he enters phase three of the battle, he’ll break his legs and will start spitting fire while crawling around.
Ludwig is a notorious foe who will fight like a beast in his first phase but will then regain some of his humanity in phase two. He will use his massive sword to attack, and as a result, he will gain an entirely new moveset you’ll have to deal with.
NPCs
- Old Hunter Yamamura: An Eastern warrior who becomes a hunter. He has been driven entirely insane and spends his time painting the walls of his cells with his blood.
- Brador: A hunter who killed his companions. He will invade you at four separate locations, dropping a piece of his unique attire each time; Brador will drop his weapon, the Bloodletter when he is finally killed.
- Simon: This NPC will appear in each location of the DLC, giving you an exposition on the events that occurred there.
Useful Items
- Simon’s Bowblade: A trick weapon that can transform from a sword to a bow.
- Whirligig Saw: A unique weapon that is essentially a giant saw blade that can be used to cause rapid-fire damage.
- The Holy Moonlight Sword: A mighty Arcane greatsword that was once wielded by Ludwig the Accursed
Lamp Locations
- Hunter’s Nightmare
- Nightmare Church
- Underground Corpse Pile
- Nightmare Grand Cathedral
Research Hall
This area is iconic for its massive spiraling staircase that reaches up to the rafters of the Research Hall. Since it is suspended so high up, a simple mistimed dodge or a surprise attack from an enemy will send you plummeting to your doom. The enemies you encounter will be mostly lankly humanoid creatures with enlarged heads; some walk slowly, others sprint scarily fast, and some crawl about. There are even a few that have no bodies at all.
There are two bosses in this area, The Living Failures and Lady Maria of the Astral Clocktower. To defeat the Living Failures, you’ll have to kill all of them individually and seek cover when they perform their meteorite attack.
Lady Maria is a challenging yet fun boss battle; she will dash about the arena with extreme speed and attack you with rapid strikes. She will power herself up with each phase, causing her attacks to have more range and do tons more damage.
NPCs
- Saint Adeline: A patient with an enlarged head. If you feed her flasks of Brain Fluid, she will eventually lose her body and just turn into a head. Adeline will give you the Milkweed Rune after she has finished her transformation.
Useful Items
- Loch Shield: An ordained shield that excels at blocking non-physical damage.
- Milkweed Rune: A Caryll Rune that transforms the user into a Celestial Being.
Lamp Locations
- Research Hall
- Lumenwood Garden
- Astral Clocktower
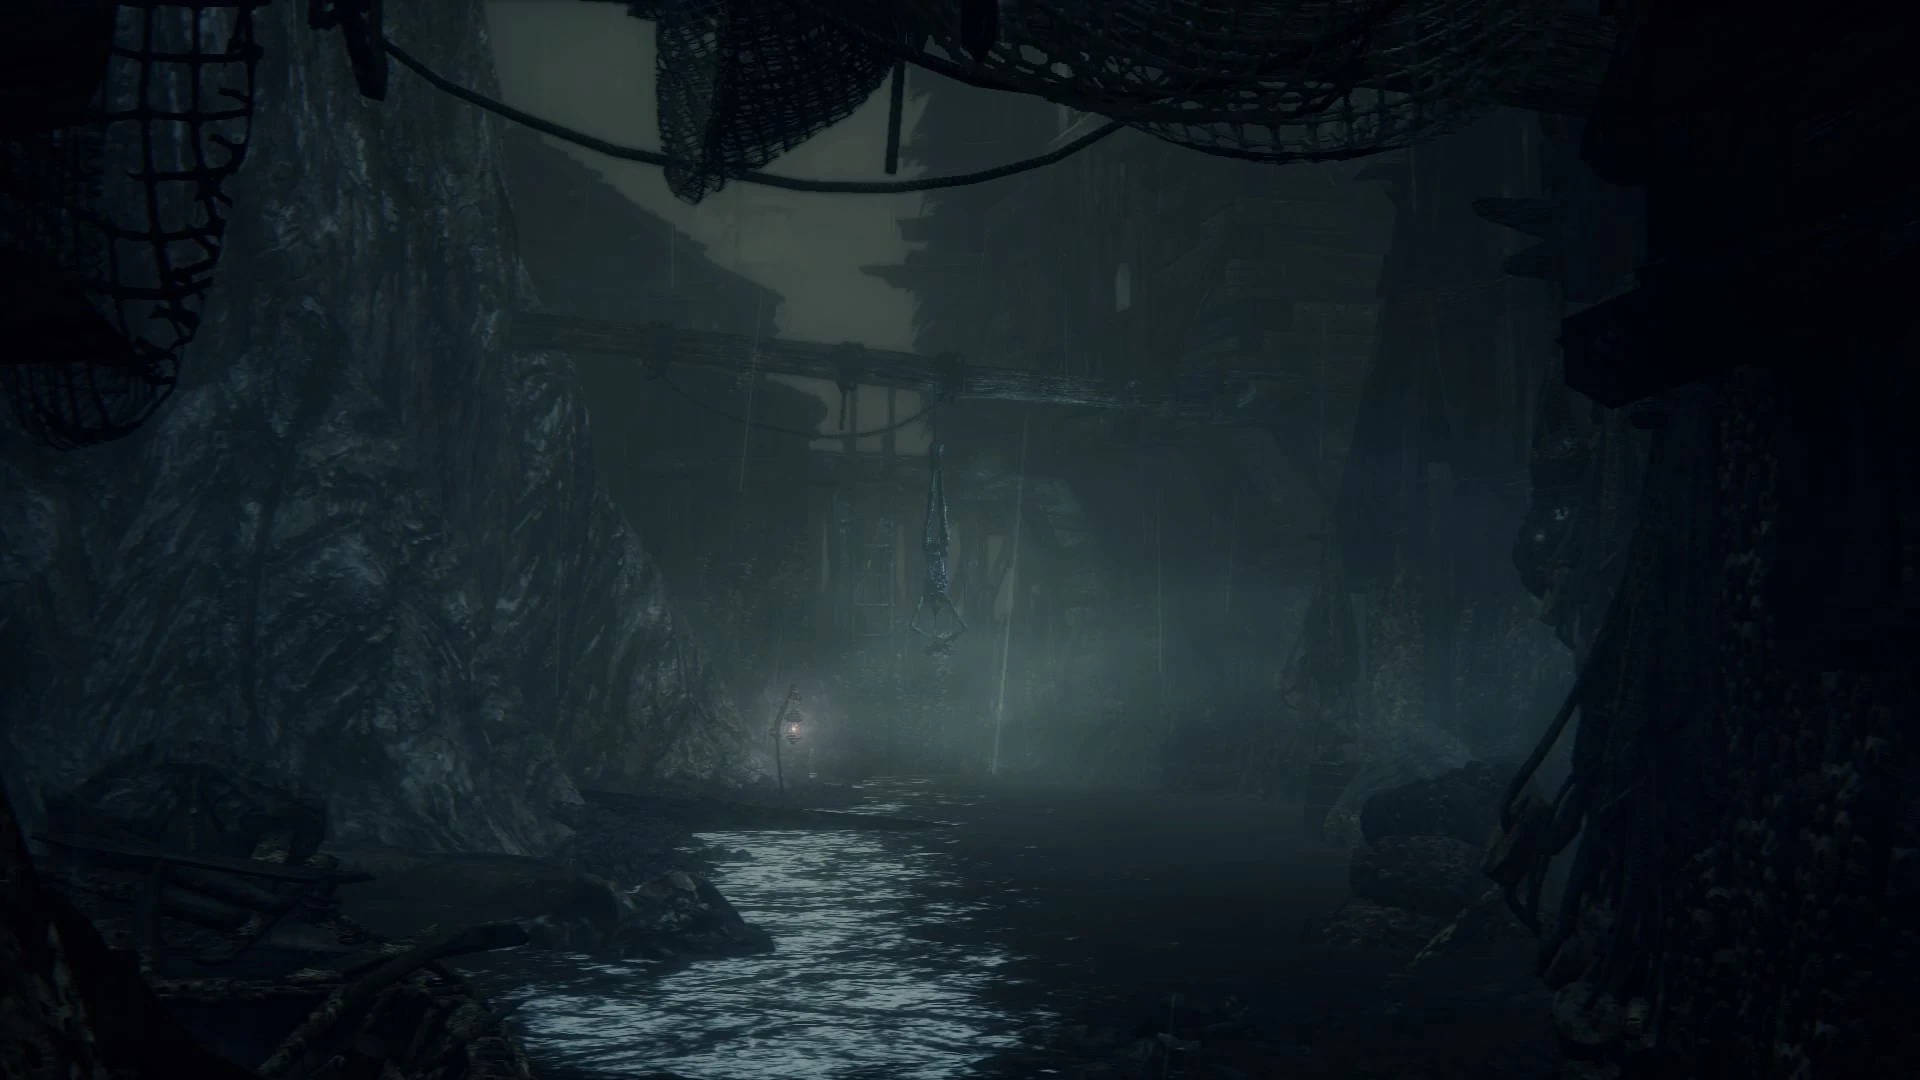
Fishing Hamlet
This is the final area of the DLC, and it will be one hell of a ride.
The first thing you’ll notice about the Fishing Hamlet is the Hamlet Resident who walks toward you. He is non-hostile and will only spout information about Byrgenwerth and the fate of the Fishing Hamlet.
As you would expect, all enemies are fish-like; ranging from simple spear-wielding Fishmen to massive hulking creatures called Shark Giants. The latter is particularly terrifying if you try to flee from them as they will chase you down with alarming speed.
The boss of this area is called the Orphan of Kos, a being of pure unadulterated power. I can safely say that this boss is the hardest in the entire game. It has surprising range, lingering hitboxes on many of its attacks, and incredible agility. All you can do is learn its attack patterns and phases by dying a lot. Eventually, you’ll beat it!
NPCs
- Simon, the Harrowed: This is where Simon’s questline concludes, and as a result, you can get his unique weapon if you didn’t already kill him back in The Hunter’s Nightmare.
- Brador: If you didn’t kill him back in his cell, this would be the final place where he will invade you
Useful Items
- Rakuyo: A fast-acting trick weapon that changes from a twin blade to a sabre and dagger.
- Kos Parasite: A unique trick weapon that switches between a right-handed tentacle weapon to a dual-wielding tentacle weapon
Lamp Locations
- Fishing Hamlet
- Lighthouse Hut
- Coast