- Bloodborne Hunter Character Guide - September 8, 2022
- Bloodborne Soft Caps Explained - March 18, 2022
- Bloodborne DLC Guide - March 16, 2022
The only expansion of Bloodborne is called The Old Hunters. The expansion contains some of the best, if not the best, bosses in the souls-borne history. We’ll get to those bosses later on in the guide.
The Old Hunters DLC includes a depiction of a nightmare world where old hunters gather and fight an endless battle with the beasts that roam the nightmare. The Old Hunter’s price is $20 for the expansion alone.
Locations Guide in The Old Hunters
The Hunter Nightmare
In order to get to The Hunter’s Nightmare, you would need to acquire the item called Eye of a Blood-Drunk Hunter. You can grab this item by the Forbidden Woods after killing the boss Vicar Amelia. After obtaining the key item and defeating the boss, head over to the Cathedral Ward, where you, an Amygdala by the wall, will grab you and teleport you to Hunter’s Nightmare.
There are two bosses in the area, Laurence, The First Vicar, and Ludwig, The Holy Blade. Both are formidable, and the recommended level for this area is around Blood Level 75-85. Lastly, two lamps correspond to each boss fight you will face within the area.
Research Hall
After defeating Laurence, The First Vicar, you can ride an elevator upwards, where it will bring you towards the Research Hall. The Research Hall is a vertically designed area of the DLC with many winding staircases and dangerous monsters such as the Scurrying Beast.
There is only one boss in the area, and that’s the creature called Living Failures. There is another boss in this area; however, I like to consider that boss part of the Astral Clocktower. It’s just that the pathway towards the other boss requires you to kill the Living Failures. Like the Hunter Nightmare, the Research Halls have two lamps available.
Astral Clocktower
Defeating the Living Failures will grant you the Astral Clocktower Key, unlock the door, and you’ll eventually get to the Astral Clocktower. Walking towards the center of the room will trigger a cinematic that leads to the Lady Maria boss fight.
After defeating Lady Maria, you’ll get to the next area, the Fishing Hamlet.
Fishing Hamlet
The Fishing Hamlet is the final area of the DLC that leads to the final boss. There are a few challenges when traveling through this area since it is a reasonably vast open space. Much like previous areas, the Fishing Hamlet only has two lamps and one boss.
There are many enemies here, so be wary when traversing this deathtrap of an area.
Bosses in the Old Hunters

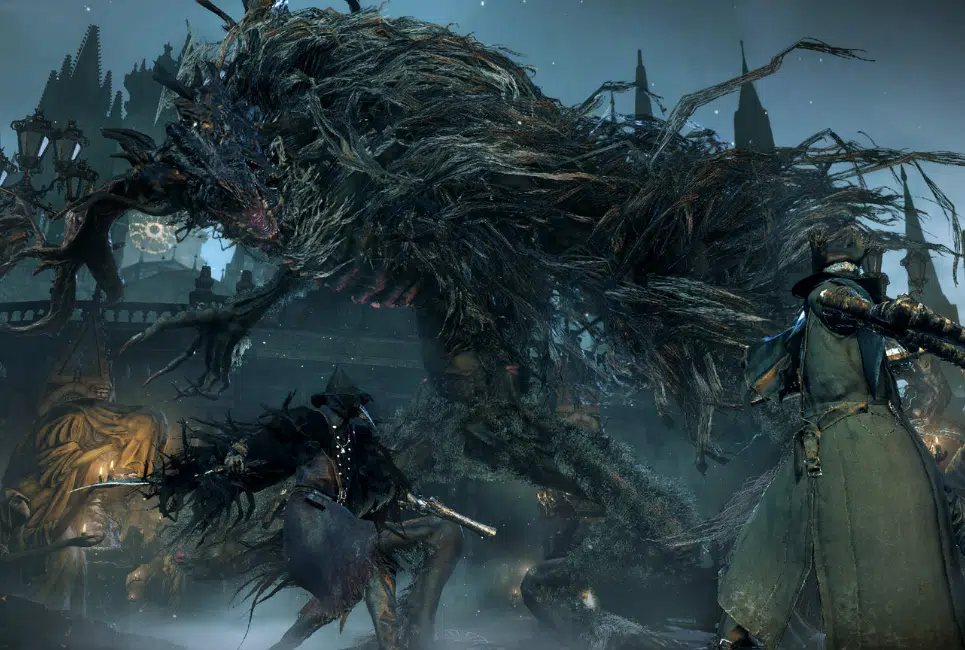
Ludwig, The Holy Blade
Ludwig, The Holy Blade is a boss found in the first area of the DLC. He has hoofed legs with two long arms and large talons. Ludwig has a blind right eye and seems to have descended into pure madness.
Ludwig is weak to Bolt, Fire, and Arcane during his first phase; however, he gains resistance to arcane once his second phase starts. We have a comprehensive guide in fighting Ludwig; check it out right here.
Laurence, the First Vicar
Laurence, The First Vicar, is basically a flaming Cleric Beast. Once you acquire the item Laurence’s Skull, you will be able to start his boss fight.
In the first phase, he has a moveset similar to the Cleric Beast; the difference is that his attacks leave a trail of flames that deal tremendous damage if your armor does not have good flame resistance. His head is his weak point, and attacking the head will lower his poise leaving him vulnerable for a visceral attack.
At 1/3 of his remaining health, Laurence will start his second phase. His legs will give in, and eventually, he’ll become a Cleric Beast with only torso and arms plus, he constantly bleeds lava from his torso, lovely addition FromSoft. A quick tip to get through this phase is instead of hugging his butt, this time, embrace his sides and play it slowly and patiently.
Living Failures
Living Failures are alien-looking creatures that have a bluish-gray color with elastic arms. The battle starts with only one Living Failure until the arena fills up with four of them at the same time. These four Living Failures share the same health pool, but once a single Living Failure takes too much damage, it dies. Whenever you kill one Living Failure, another one will spawn and take its place.
It’s a reasonably easy gank battle; focusing on one Living Failure at a time will help a lot even though another one spawns. This method lets you have some room to breathe since you only have to deal with three Living Failures for the time being. In the second phase, these creatures will summon a meteor which can easily be avoided by running counterclockwise.
If you still need more help, you can summon Yamamura, assuming you killed him in his cell before the boss fight — more on that later.
Lady Maria of the Astral Clocktower
Lady Maria is one of the best bosses ever by FromSoft. She wields the Rakuyo, transforming into a dual-wielding Sabre and the dagger. There are three phases of Lady Maria.
The first phase has her fighting typically with the Rakuyo, switching between forms of it, and sometimes using her gun in between those modes. Learn her tells and attacks during this phase, and you’ll quickly reach the second phase.
Lady Maria heavily telegraphs the start of her second phase by stabbing her chest with the Rakuyo, producing an explosion of blood and coating her weapon with her blood as well.
This phase is almost similar to the first phase with a new effect that her regular attacks now have an extended range with blood. She also gains a few more new attacks in this phase; study this phase well and the effective range for her attacks, and you’re golden.
The third phase starts with Lady Maria levitating from the ground, slowly siphoning the blood and exploding in a large radius. All of her attacks now have a fire property and guess what? Most of her attacks now track you. What a way to end the boss fight, right? Some attacks can now stagger you, opening her up for a visceral attack on you.
Here are some tips that you can take into account while fighting her:
- Dodging to your left avoids most of her attack.
- You can parry Lady Maria throughout her three phases; it’s better to do this during the first phase, wherein her attacks don’t have elements yet.
- Choose a reasonably quick weapon to stagger her indefinitely by spamming R1 (threaded cane, etc.)
Orphan of Kos
Time for one of the most demanding bosses in the game, the Orphan of Kos is the final boss of The Old Hunters DLC. This boss is highly aggressive and very mobile, and lastly, he has a lot of HP. His first phase has a lot of varying moves and different tells, which is hard to take in once you start battling him.
Not only that, but he also has a second phase in which he transforms after biting his weapon, becomes slightly more prominent, further expands his moveset while enhancing his previous ones. He is also much more mobile in this face; tracking him is more complex.
Here are a few tips to help you with this fight:
- Stick to your right side when dodging.
- Players can parry him in both phases.
- Utilize the large environment you’ll be fighting in, especially when he starts to wind up for his second phase.
- Using heavy weapons during his first phase will stagger him most of the time.
NPCs in the Old Hunters

Brador
Brador is an NPC found in prison near the Underground Corpse Pile Lamp. You would need to find the key item, Underground Cell Inner Chamber Key, and also, you would need to kill Ludwig to have access to him. According to his description, Brador is a Church Assassin who killed his former compatriots and wore their remains as attire.
If you choose to spare Simon the Harrowed, you will find him wounded at the door of the hut (Lighthouse Hut Lamp), and he will reveal that Brador attacked him. Simon will give the player his weapon, Simon’s Bowblade, and also the Underground Cell Inner Chamber Key before passing away.
Brador will then start invading you in the Fishing Hamlet a total of four times. To stop him from invading you from time to time, open his cell using the key that Simon provided, slay him, don’t worry as he won’t fight back; he will then drop his weapon, the Bloodletter.
Old Hunter Yamamura
Old Hunter Yamamura is an old hunter, and a League Hunter stuck in Hunter’s Nightmare. During his time as a warrior, he lost himself after staring straight into impurity, probably a Vermin. To counteract the madness, he had his consciousness sent to Hunter’s Nightmare and locked it up in a cell where he awaits his death.
Players can summon Old Hunter Yamamura for these bosses:
- Darkbeast Paarl
- The One Reborn
- Living Failures
Saint Adeline
Saint Adeline is part of the research done in the Clocktower; she was a clocktower patient at the research hall. She is also a blood saint bound to her chair with a blood vial on her arm. Once you meet her, she will ask for Brain Fluids; this will give her the focus for a specific sound that only she can hear.
- Upon giving the first brain fluid, Saint Adeline will reward players with her blood (Blood of Adeline).
- The second reward for another brain fluid would be the Balcony Key.
- The final reward would be a Milkweed Rune.
Simon The Harrowed
Simon the Harrowed serves as the player’s guide once they step foot into Hunter’s Nightmare. He tells you the lore of the Hunter’s Nightmare, how it came to be and what happens within the nightmare.
His questline is straightforward, talk to him by the shortcut near the Hunter’s Nightmare’s lamp and at the Research Hall’s lamp. You can find him critically injured near the lighthouse hut at the end of his quest. Before he dies, he provides the player with the Underground Cell Inner Chamber Key and his bowblade (Simon’s Bowblade).
Items In The Old Hunters

Caryll Runes
- Guidance- Caryll Runes
This Caryll Rune boosts rally potential by 10% up to 30%. Carrion crows and Ludwig rarely drop this rune (about 10% chance for the crows, and Ludwig drops this for about 20% chance).
- Beast’s Embrace – Covenants & Caryll runes
When players decide to equip this rune, it will transform them into “The Ghastly Beast.” The transformation of the ghastly beast allows players to take on a werewolf-like form with large claws as their primary weapons. They will also be more agile, moving in and out of attacking and weaving dodges altogether.
Laurence, the First Vicar, drops this rune upon defeating him.
- Milkweed- Covenants & Caryll Runes
The Milkweed Rune allows the player to transform into a celestial Kin form. Equipping the Kos Parasite in tandem with this rune gives the players the extra increase in dodge distance and a new dodge animation.
Players can acquire this rune by providing a Saint Adeline with a third Brain Fluid.
Key Items
Here are a few key items you can grab throughout The Old Hunter’s DLC.
- Astral Clocktower Key– Drops from the Living Failures boss fight.
- Balcony Key– Saint Adeline’s second reward. Players can use this to open the locked door on the first floor of the research hall.
- Celestial Dial– Drops from Lady Maria of the Astral Clocktower to access the Fishing Hamlet area.
- Eye Pendant– Held by Laurence, the First Vicar at The Hunter’s Nightmare. Players can use this pendant to activate the altar elevator to the Research Hall.
- Firing Hammer Badge– Players can acquire this by going downstairs inside the dimly lit house at Hunter’s Nightmare, exiting through the left door, going up staircases, and killing the beast-clawed hunter. This badge unlocks the piercing rifle, delayed Molotov, and the delayed rope Molotov in the shop.
- Laurence’s Skull– Grab this key item from the altar after activating the elevator with the eye pendant. After getting the skull, Laurence’s boss fight will initiate.
- Underground Cell Inner Chamber Key– Simon the Harrowed provides this key to the player once done with his questline or if the player chooses to kill Simon early on.
- Underground Cell Key– Players will find this at a dead body in the Patient Room Floor 3 in the Research Hall. This key can unlock the cells, which allow you to get the Church Pick and the Yamamura Hunter Set.
- Brain Fluid– This item is a quest item for Saint Adeline. It drops from the Enlarged Head at the top of the research hall, at the middle platform, and the last is by killing Adeline when she turns into an Enlarged Head herself.
Consumables
- Delayed Molotov and the Delayed Rope Molotov– Players can purchase these upon gathering the Firing Hammer Badge.
Weapons in The Old Hunters

- Amygdalan Arm- A weapon that transforms from a club to a scythe-like weapon. The Amygdalan Arm is at the cave near the end of the Blood River.
- Beasthunter Saif- This weapon can transform from a curved long sword to a short weapon. Players would have to kill a hunter to grab the Beasthunter Saif near the blood river.
- Beast Cutter- This weapon transforms from a one-handed cleaver to a heavy whip. Players can find this in the Grand Cathedral.
- Bloodletter– This weapon can transform from a short one-handed mace to a large two-handed morning star at the expense of the user’s health. Players can obtain this by killing Brador in his cell.
- Boom Hammer- A hammer that ignites when the player transforms it, providing additional fire damage. Players can find the Boom Hammer at Hunter’s Nightmare inside the house that looks like it came from Central Yharnam.
- Church Pick- The Church Pick can transform from a large sword to a war pick. Players can obtain this by using the underground cell key and killing a hunter wearing the Yahar’Gul set.
- Holy Moonlight Sword– The best weapon in Bloodborne that players can acquire by simply defeating Ludwig and talking to his severed head.
- Kos Parasite– A trick weapon that players can get by killing the Orphan of Kos. The weapon transforms into either a right-hand tentacle to dual-wield tentacles.
- Rakuyo– A trick weapon that Lady Maria uses, players can find the Rakuyo by fighting two shark giants at the bottom of the well in Fishing Hamlet. The second shark drops the Rakuyo.
- Simon’s Bowblade– A weapon that transforms from a one-handed blade to a bow. Simon gives this to the player by completing his questline, or players can opt to kill Simon early on when they meet him and grab his weapon.
- Whirligig Saw– A fantastic weapon for the mid-late game in Bloodborne. This weapon helped me beat Ludwig, and players can find this weapon at Hunter’s Nightmare. For a more specific guide on how to get this, check out this article we have.
Firearms (Off-hand)
- Church Cannon- A weapon found in a hidden chest at the Research Hall using the eye pendant to utilize the elevator in a specific pattern.
- Fist of Gratia– A left-hand weapon that offers no transformation. Players can find this weapon inside the last cell after fighting Ludwig.
- Gatling Gun– A portable version of the stationary Gatling gun that players find at Hunter’s Nightmare by going to the cave near the building shortcut to the Cleric Beast.
- Piercing Rifle– A great gun that is optimal against groups of enemies as its bullets can pierce through them. Players can purchase this weapon after acquiring the Firing Hammer Badge.
- Loch Shield– A shield that can only minimize the damage taken from the attack. Players can acquire this at the Research Hall by activating a lever that raises the stairs then dropping down to the path below.
- Blacksky Eye– A powerful arcane weapon that players can find at the balcony area of the Research Hall with the usage of the Balcony Key.
- Accursed Brew– A ranged weapon that throws a concoction of curses. Players can obtain this by talking to an NPC upon getting to the Fishing Hamlet. They need to equip the Milkweed Rune, and the ranting villager will reward them with the Accursed Brew.
Armor Sets in the Old Hunters

- Butcher Set– Players can find the complete set at Hunter’s Nightmare once they go left past the Nightmare Executioner with a cannon between a pair of Nightmare Executioners.
- Constable Set– This set consists of four pieces; players can find three pieces throughout the Nightmare Cathedral. At the same time, players can find the helm piece by completing Valtr’s questline. We have a detailed guide on getting the helm piece at our “Vermin” article.
- Old Hunter Set– Players can find this piece by piece near the starting area of The Hunter’s Nightmare.
-
- The Old Hunter’s Top Hat is past the Nightmare Grand Cathedral, in a building that looks like it came from Central Yharnam.
- The Old Hunter’s Garb is near the flaming boulder up the Grand Cathedral staircase; go to the left, and a body will be there containing the Old Hunters Garb.
- The Old Hunter’s Gloves is at the ledge of a house nearby the starting lamp of The Hunter’s Nightmare. Go up the ramp, and drop over to get the item from a body hanging at the ledge.
- The Old Hunter’s Trousers is at a ledge. Players can find this ledge from the starting lamp. Going through two flights of stairs, choosing the left stairs afterward, and keep pushing left until you get to the ledge, jump down from it, and you’ll be able to grab the trousers.
- Use this video to help you in finding these pieces.
-
- Decorative Old Hunter Set– Players can find this set in the side rooms upon reaching the Research hall. From the first lamp, head up the stairs, then to the left side, take up the elevator and lastly, go right down the ladder and take the set from the body.
- Yamamura’s Set– This set belongs to the Old Hunter Yamamura. Players can access this set using the Underground Cell Key and killing Yamamura inside his cell.
- Maria Hunter Set– Players can buy this set from the Bath Messengers after killing Lady Maria of the Astral Clocktower. Also, this is the most expensive set in the game.
- Harrowed Set– Players can get this set by going through the shortcut ladder near the Fishing Hamlet’s first lantern. After using the ladder, an opening to a shack would be on the right side. Upon entering the second floor, two enemies guard this set at the end of the room.
- Brador’s Set– A set used by Brador which players can obtain by defeating him every time he invades the player during their exploration at the Fishing Hamlet.
- Enlarged head– A single headpiece that players can find on the fifth floor of the Research Hall (same level as the gatling gun guy).
Frequently Asked Questions
Conclusion
The Old Hunter’s DLC provides answers to some lingering questions and an interesting take on estranged old hunters mentioned by other characters throughout your journey of Bloodborne. The bosses are top-notch, and the level design is terrific as well. Overall, if you want to complete your Bloodborne experience, definitely get this DLC.
Continue reading: